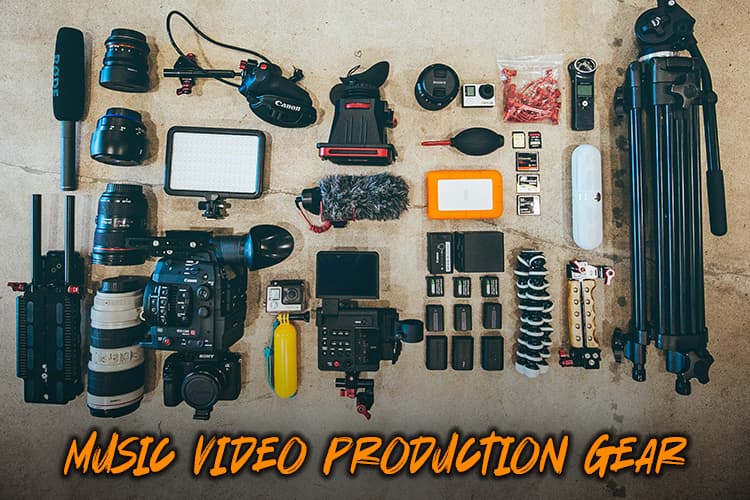
The way artists make music videos is constantly evolving, and having the right gear can make all the difference between a amateur-looking video and a professional masterpiece.
Did you know that 86% of music fans say that music videos are an important part of their music listening experience?
According to a research study done by Music and Science, visual information can have a profound effect on how music is perceived and remembered.
That’s why it’s crucial to invest in quality equipment.
In this guide, we’ll explore the essential music video production gear you need to create stunning visuals that perfectly complement your sound. Let’s dive in and discover how to make your music videos shine!
High-Quality Music Video Production Gear

When it comes to shooting music videos, the camera you choose can make or break your whole production.
I’ve learned this the hard way over the years, trust me!
There was this one time I thought I could get away with using my old point-and-shoot for a friend’s band video. Big mistake.
The footage looked like it was shot through a potato, and we had to reshoot the whole thing. Talk about embarrassing!
Cameras
So, let’s chat about some killer camera options that’ll make your music videos pop.
First up, we’ve got DSLRs and mirrorless cameras. These babies are the real deal when it comes to getting that cinematic look.
I’m talkin’ about cameras like the Canon EOS R5 or the Sony A7III. They’re not cheap, but man, the quality you get is insane.
Now, if you’re on a budget (and believe me, I’ve been there), don’t sweat it. There are some great options that won’t break the bank.
The Panasonic Lumix G7 is a solid choice that’ll give you 4K footage without emptying your wallet.
Speaking of 4K, that’s something you definitely want to consider. It’s not just a buzzword – the difference in detail is mind-blowing.
But here’s the thing: it’s not just about resolution. Frame rates are super important too, especially for music videos where you might want to do some slow-mo shots.
Look for cameras that can shoot at least 60fps in 1080p, or even better, 120fps if you can swing it.
Now, let’s talk accessories ’cause they can really take your footage to the next level.
Lenses
A good lens is crucial – I’d recommend starting with a versatile zoom lens like a 24-70mm.
Stabilization
And don’t forget about stabilization! A tripod, gimbal or camera stabilizer will save your life when you’re trying to get those smooth, professional-looking shots.
Here’s a quick list of some of the best cameras for music videos :
- Canon EOS R5 (if you’ve got the budget)
- Sony A7III (great all-rounder)
- Panasonic Lumix G7 (budget-friendly option)
- 24-70mm lens (versatile for most shots)
- DJI Ronin-S gimbal (for silky smooth movement)
Remember, at the end of the day, it’s not just about having the fanciest music production video gear. It’s about how you use it.
I’ve seen people create amazing videos with entry-level cameras, and I’ve seen people with top-of-the-line equipment produce total duds.
So don’t get too hung up on having the absolute best – focus on learning your equipment inside and out.
Music Video Production Gear: Lighting Equipment

Alright, let’s shed some light on the subject of, well, lighting!
Trust me, good lighting can make even the most basic camera setup look like a million bucks.
I remember this one time I was shooting a video in my buddy’s garage, and we thought we could get away with just the overhead fluorescents.
Big yikes. Everyone looked like they were auditioning for a zombie flick!
So, what kinda lighting setups should you be looking at for music videos?
LED Lights
Well, LED panels are pretty much the bomb dot com these days. They’re versatile, they don’t get hot like traditional lights, and some of ’em even let you change colors on the fly.
I’ve got a set of Aputure AL-M9 lights that I absolutely adore for small setups.
I also love using LED panel light kits as they are light weight, can fit almost in any location and I can handle them by myself.
RGB Lights
Now, when it comes to creating dynamic effects, color-changing lights are where it’s at.
You can create some seriously cool moods with these bad boys.
I’m talking about lights like the RGBWW panels that let you dial in any color you want. I
t’s like having a tiny disco in your pocket!
But here’s the thing – you don’t always have the luxury of shooting in a controlled environment.
Portable Lights
That’s where portable lighting options come in clutch.
I’ve got this little LED light that clips onto my phone, and it’s saved my bacon more times than I can count for impromptu shoots.
Here’s a quick rundown of some lighting gear that’s worth checking out:
- Aputure AL-M9 (great portable option)
- Neewer 660 LED Video Light (affordable but powerful)
- Godox SL-60W (if you need something with a bit more oomph)
- Philips Hue lights (for some funky color effects)
One thing I’ve learned over the years is that you don’t need a ton of lights to create a great look.
Sometimes, less is more. I’ve done shoots with just one main light and a reflector, and they’ve turned out awesome. It’s all about understanding how to shape and control the light you have.
Natural Lighting
And don’t forget about natural light!
If you’re shooting outdoors or near windows, the sun can be your best friend (or your worst enemy if you don’t know how to work with it).
I always try to schedule outdoor shoots during the “golden hour” just before sunset. The light is just chef’s kiss during that time.
Pro Tip: Always bring more extension cords than you think you’ll need. There’s nothing worse than having the perfect lighting setup planned out, only to realize you can’t reach the nearest outlet. Been there, done that, got the t-shirt!
Remember, lighting isn’t just about making things visible. It’s about creating mood, depth, and atmosphere.
Play around with different setups, and don’t be afraid to get creative. Some of the coolest lighting effects I’ve seen in music videos were happy accidents!
Audio Recording Gear for Crisp Sound

Okay, let’s talk audio, ’cause let’s face it – a live music video ain’t worth squat if it sounds like it was recorded in a tin can.
I learned this the hard way when I tried to use my camera’s built-in mic for a live performance video.
Spoiler alert: it was a disaster. The audio was so bad, you couldn’t even tell what song they were playing!
Microphones
So, first things first – you need a good microphone.
For live performances, I swear by the Shure SM58.
This little beast is practically indestructible (I’ve literally dropped mine off a stage and it kept on ticking), and it sounds great for vocals.
If you’re looking for something a bit fancier, the Sennheiser e935 is chef’s kiss.
But here’s the thing – a great mic is only part of the equation.
Audio Interface
You need a way to get that sweet, sweet audio into your recording device. That’s where audio interfaces come in.
I use the Focusrite Scarlett 2i2, and it’s been a game-changer. It lets me plug in multiple mics or instruments and get clean, professional-sounding recordings.
Portable Recorders
Now, if you’re doing any kind of location shooting, a portable recorder is gonna be your new best friend.
I’ve got a Zoom H4n Pro, and let me tell ya, this thing is a lifesaver.
It’s got built-in mics that sound surprisingly good, plus you can plug in external mics if you need to.
Here’s a quick list of some audio gear I wouldn’t leave home without:
- Shure SM58 microphone (for vocals)
- Focusrite Scarlett 2i2 audio interface
- Zoom H4n Pro portable recorder
- Audio-Technica ATH-M50x headphones (for monitoring)
Monitors
Speaking of monitoring, that’s super important too.
You need to be able to hear what you’re recording, and trust me, those little earbuds ain’t gonna cut it.
I use the Audio-Technica ATH-M50x headphones, and they’re awesome for getting a clear picture of your audio.
Acoustics
One thing I’ve learned over the years is that room acoustics can make or break your audio.
I once tried to record in this empty apartment with hardwood floors, and the echo was insane.
Now I always bring some blankets or foam panels to help deaden the sound if I’m shooting in a less-than-ideal space.
Pro Tip: Always, ALWAYS do a test recording before the real deal. There’s nothing worse than thinking you’ve got a great take, only to realize later that your levels were off or you had some weird interference.
Remember, at the end of the day, the best music video production gear in the world won’t save bad technique.
Take the time to learn proper mic placement, how to set levels, and how to minimize background noise.
Your future self will thank you when you’re not tearing your hair out in the editing room!
Editing and Post-Production Music Video Gear

Alright, let’s dive into the world of editing and post-production. This is where the magic happens, folks!
I remember when I first started out, I thought I could just slap some clips together in Windows Movie Maker and call it a day. Boy, was I in for a rude awakening!
These days, there are some seriously powerful editing tools out there.
For video editing, I’m a big fan of Adobe Premiere Pro.
It’s got a bit of a learning curve, but once you get the hang of it, you can do some pretty amazing stuff.
If you’re on a Mac, Final Cut Pro is another solid choice.
And for those on a budget, DaVinci Resolve has a free version that’s surprisingly robust.
Color Grading
Now, let’s talk about color grading ’cause that’s where you can really make your footage pop.
I use DaVinci Resolve for this (even when I edit in Premiere) because its color tools are just chef’s kiss.
The first time I properly color graded a video, it was like seeing in color for the first time.
Suddenly, my flat, boring footage looked like something out of a Hollywood movie!
But here’s the thing – color grading is an art in itself.
It took me ages to get the hang of it, and I’m still learning new tricks all the time.
Pro Tip: Always shoot in a flat color profile (like LOG) if your camera supports it. It’ll give you way more flexibility in post.
Check out my Mastering Music Video Color Grading article if want a deep dive into color.
Special Effects
Now, let’s get into the fun stuff – special effects!
After Effects is the industry standard for this, and for good reason. You can do some seriously cool stuff with it.
I once spent an entire weekend figuring out how to make it look like my friend was shooting lasers out of his eyes for a music video.
Was it necessary? Probably not. Was it awesome? Heck yeah!
Here’s a quick rundown of some post-production tools I use regularly:
- Adobe Premiere Pro (video editing)
- DaVinci Resolve (color grading)
- Adobe After Effects (special effects)
- Audacity (audio editing)
- Red Giant Universe (for some extra VFX pizzazz)
Audio Editing
Speaking of audio, don’t forget about post-production for your sound!
I use Audacity for basic audio editing (it’s free and gets the job done), but if you’re doing serious audio work, you might want to look into something like Pro Tools or Logic Pro.
One thing I’ve learned the hard way: organization is key in post-production.
Nothing’s worse than spending hours looking for that one perfect clip because you didn’t label your files properly.
I now have a whole system for organizing my projects, and it’s saved me countless hours of frustration.
Pro Tip: Render out your project in chunks as you go along. That way, if your computer crashes (and trust me, it will at some point), you won’t lose hours of work.
Remember, post-production is where you can really let your creativity shine.
Don’t be afraid to experiment and try new things.
Some of the coolest effects I’ve created were happy accidents that happened while I was just messing around!
Essential Music Video Production Gear: Accessories

Alright, let’s chat about the unsung heroes of music video production gear – accessories!
These are the bits and bobs that might not seem glamorous, but trust me, they can make or break your shoot.
I learned this the hard way when I showed up to a gig without a tripod. Trying to hold a camera steady for a three-hour shoot? Not fun, folks. Not fun at all.
TriPods
First up, let’s talk stabilization. A good tripod is worth its weight in gold. I swear by my Manfrotto BeFree – it’s sturdy enough for serious work but light enough that I don’t feel like I’m lugging around a small child.
Gimbals
And for those smooth moving shots? A gimbal is a game-changer. I use the DJI Ronin-S, and it’s like having a tiny, robot camera operator.
Green Screens
Now, let’s get into the world of backgrounds. Green screens can be a lifesaver when you’re shooting in less-than-ideal locations.
I once had to shoot a video in my buddy’s messy garage, but with a green screen and some post-production magic, it looked like we were in a slick, futuristic lab.
Just remember: lighting your green screen evenly is crucial. I learned that one the hard way!
Check out my article Green Screen Music Video Tips for some cool visual effect ideas.
Here’s a quick list of some accessories I never leave home without:
- Manfrotto BeFree tripod
- DJI Ronin-S gimbal
- Neewer Green Screen (portable and easy to set up)
- SanDisk Extreme Pro memory cards
- WD My Passport external hard drive
Memory Cards
Speaking of memory cards, don’t skimp on these! Nothing’s worse than having your card fail in the middle of a shoot.
I always bring way more storage than I think I’ll need, both in terms of memory cards and external hard drives. Better safe than sorry, right?
Slates
Oh, and let’s not forget about some of the smaller, but super handy tools.
A slate board might seem old school, but it’s invaluable for syncing audio and video.
Light Meter
And a good light meter can save you tons of time getting your exposure right.
Emergency Kit
One thing I’ve learned over the years: always have a “emergency kit” with you.
Mine includes things like gaffer tape, extra batteries, a multi-tool, and even a few snacks (trust me, a hangry crew is not a productive crew).
Pro Tip: Invest in a good bag to carry all this stuff. I used to just throw everything in a duffel bag, but after one too many times digging around for that one cable I needed, I splurged on a proper camera bag with lots of compartments. It’s been a total game-changer.
Remember, at the end of the day, these accessories are tools to help you tell your story.
Don’t get so caught up in the gear that you forget about the creative side of things.
Some of the best music videos I’ve seen were shot with minimal equipment but loads of imagination!
Conclusion
Equipping yourself with the right music video production gear is the first step towards creating visually stunning and professionally polished music videos.
By investing in quality cameras, lighting, audio equipment, and post-production tools, you’ll be well on your way to bringing your musical vision to life on screen.
Remember, the gear is just the beginning – it’s your creativity and passion that will truly make your music videos shine.
So, gear up, let your imagination run wild, and start creating those unforgettable visual masterpieces that will captivate your audience and elevate your music to new heights!