As a filmmaker, you know that color can make or break your music video. Did you know that 90% of viewers make subconscious judgments about content within the first 90 seconds, and up to 90% of that assessment is based on color alone?
That’s right – color grading isn’t just a final touch; it’s a powerful storytelling tool that can transform your music video from good to unforgettable.
In this guide, we’ll dive into the art and science of music video color grading, exploring techniques that will help you create visually stunning and emotionally impactful videos in 2024.
Get ready to unleash your creativity and take your color grading skills to the next level!
Understanding the Basics of Music Video Color Grading
Let me tell ya, color grading in music videos is no joke!
I’ve been at this game for years, and I still learn something new with every project.
It’s like painting, but with pixels instead of brushes.
Color grading is all about tweaking the colors and tones of your video to create a specific look or mood.
You can shoot on the best music video cameras in the world but if you don’t know how to color grade your video will look like garbage.
I remember my first attempt at color grading – what a disaster! I thought I could just slap on a filter and call it a day.
Boy, was I wrong. It took me ages to figure out the difference between color correction and color grading.
Color correction is like fixing your mistakes, you know?
Making sure everything looks normal and balanced. But color grading? That’s where the magic happens.
It’s all about creating a unique visual style that matches the vibe of the song.
Speaking of vibes, color theory is super important in music video color grading.
It’s not just about making things look pretty – it’s about telling a story through color.
I once worked on a video where we used warm, golden tones to create a nostalgic feel for a song about childhood memories. It turned out amazing!
When it comes to tools and software, there’s a ton of options out there.
I started with Final Cut Pro X, which is free and pretty powerful.
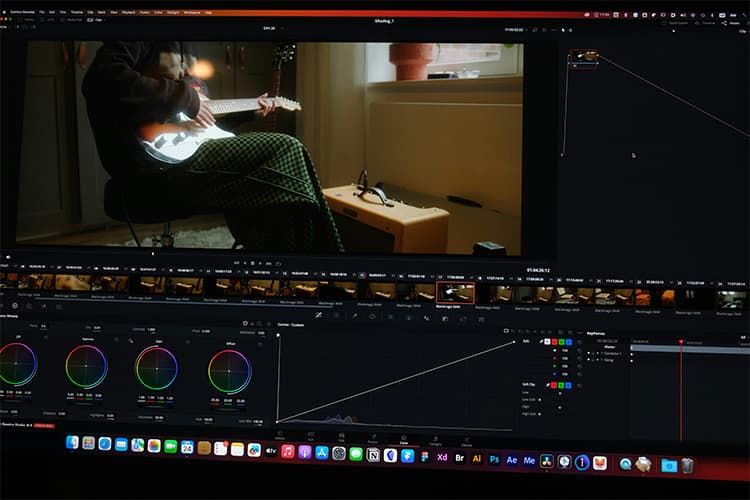
But these days, I’m all about DaVinci Resolve. It’s got everything I need in one place.
Some other popular music video editing software choices include:
One thing I’ve learned over the years is that you don’t need the fanciest tools to create great color grades.
It’s all about understanding the basics and practicing your craft.
Trust me, I’ve seen some killer music videos that were color graded on a laptop with free software!
Pro Tip: Always work on a calibrated monitor. I learned that the hard way when I spent hours perfecting a grade, only to find out it looked completely different on other screens. Talk about frustrating!
Color grading is like a superpower for music video creators. It can transform a bland, lifeless video into something that pops off the screen and grabs the viewer’s attention.
Just remember, it’s not about making everything look perfect – it’s about creating a mood and atmosphere that supports the music and the artist’s vision.
Creating Mood and Atmosphere Through Color Grading
Alright, let’s dive into the juicy stuff – using color grading to create mood and atmosphere in music videos.
This is where things get really fun, and where you can let your creativity run wild!
Color Psychology
First off, let’s talk about color psychology. It’s crazy how different colors can affect our emotions, right?
I remember working on this moody R&B video where we used lots of blues and purples to create a sense of mystery and sensuality. The artist loved it so much, she even changed her stage lighting to match!
But here’s the thing – you gotta be careful not to go overboard.
You didn’t come all this way, learn how to make a music video, just to kill it with the color grade!
I once got carried away with a super saturated, high-contrast look for a pop video. The label hated it, said it looked like a “neon nightmare”. Lesson learned: sometimes less is more!
When it comes to reinforcing the song’s message and tone, color grading is your secret weapon. For upbeat, happy songs, I love using warm, bright colors.
Cool, desaturated tones work great for more melancholic tracks. And for those epic power ballads? Nothing beats a cinematic, high-contrast look with deep blacks and bright highlights.
Let’s look at some successful music videos with killer color grades:
Beyoncé’s “Hold Up” – That golden yellow grade perfectly captures the song’s themes of jealousy and rage.
The Weeknd’s “Blinding Lights” – The neon-soaked, high-contrast grade creates a vibrant, retro-futuristic vibe.
Billie Eilish’s “when the party’s over” – The desaturated, blue-tinted grade enhances the song’s somber mood.
One of the trickiest parts of color grading music videos is balancing artistic vision with genre expectations.
You wanna push boundaries, but not alienate the audience, ya know?
I’ve found that it helps to start with a grade that fits the genre, then gradually push it in a more unique direction.
Pro Tip: Always keep the artist’s brand in mind.
I once created this amazing, grungy grade for a pop princess… and got shut down immediately. It just didn’t fit her image. Now, I always ask for reference images of the artist’s style before I start grading.
At the end of the day, creating mood and atmosphere through color grading is all about experimenting and trusting your instincts.
Don’t be afraid to try crazy things – sometimes the weirdest ideas lead to the most stunning results.
And remember, there’s no “right” way to grade a music video.
As long as it supports the song and looks dope, you’re on the right track!
Advanced Color Grading Techniques for Music Videos
Alright, buckle up ’cause we’re about to get into some advanced color grading techniques that’ll take your music videos to the next level! Trust me, once you master these, you’ll be the go-to colorist for all the hottest artists.
LUTs
Let’s start with color grading looks and LUTs (Look-Up Tables).
These bad boys are like Instagram filters on steroids. They can instantly transform your footage and give it a specific mood or style. I remember the first time I used a LUT – it was like magic!
Pro Tip: Don’t rely on LUTs too heavily and make sure your footage is balanced first. Use them as a starting point, then tweak and adjust to make the look your own.
Some of my favorite LUT companies:

Selective Color
Now, let’s talk about selective color adjustments and secondary color correction. This is where you can really flex your creative muscles.
I once worked on a hip-hop video where we isolated the artist’s gold chain and made it pop against a desaturated background. The result was sick! It took some time to get the mask just right, but man, was it worth it.
One of the trickiest parts of color grading music videos is creating visual continuity across different scenes.
You might have shots from multiple locations or different times of day, but you want it all to feel cohesive.
I’ve found that using adjustment layers with overall color adjustments can help tie everything together.
Just be careful not to lose the unique character of each scene.
Creative Effects
Now, let’s get into some really fun stuff – creative effects like color isolation and tonal contrasts.
These techniques can create some seriously eye-catching visuals.
I once did a video where we gradually desaturated everything except for the lead singer’s red dress.
As the song built up, the red became more and more intense.
The director loved it so much, he wanted to use it for the whole video! (We compromised and used it for the chorus.)
Here are some advanced techniques I love to use:
- Split-toning: Adding different colors to the shadows and highlights
- Crushing the blacks: For a more cinematic, high-contrast look
- Color bleeds: Using RGB curves to add subtle color tints to specific tonal ranges
Pro Tip: Always keep a backup of your original grade.
I once spent hours on a complex grade, only to have the client ask for something completely different at the last minute. Now, I always save multiple versions as I go.
Remember, these advanced techniques are powerful tools, but they’re not a substitute for good taste and understanding of the music and visuals.
I’ve seen plenty of over-graded videos that look impressive at first glance but don’t actually serve the song or the artist.
Always ask yourself: does this enhance the viewing experience, or is it just showing off?
And hey, don’t be afraid to break the rules sometimes!
Some of the most iconic music video looks came from colorists who weren’t afraid to push boundaries and try new things.
So go ahead, experiment, make mistakes, and have fun with it.
That’s how you’ll develop your own unique style and become a master of music video color grading!
Optimizing Color Grading for Different Music Video Styles

Alright, let’s get into the nitty-gritty of optimizing color grading for different music video styles.
This is where you really get to show off your versatility as a colorist.
Trust me, being able to adapt your grading style to different genres and concepts is what separates the pros from the amateurs.
First up, let’s talk about adapting color grading techniques for various genres.
Pop Videos
Pop videos often call for bright, vibrant colors that pop off the screen.
I remember working on this bubblegum pop video where we used a green screen. We pushed the saturation to the max and added a slight pink tint to everything. It was borderline obnoxious, but it fit the song perfectly!
Rock Videos
Rock videos, on the other hand, often benefit from a grittier, high-contrast look.
I once graded a metal video where we crushed the blacks and added some film grain for that raw, edgy feel.
The band loved it so much, they asked me to grade their entire album’s worth of videos!
Hip-hop videos can go in a lot of different directions, depending on the artist and the song.
I’ve done everything from super-saturated, almost cartoonish grades for fun party tracks to moody, desaturated looks for more serious songs.
The key is to really listen to the music and try to capture its essence in your grade.
Video Concepts
Now, when it comes to different video concepts, you’ve gotta be ready to switch up your approach.
Performance videos often benefit from a more neutral grade that lets the energy of the performance shine through.
Narrative videos, on the other hand, give you more room to play with stylized looks that enhance the storytelling.
I once worked on this abstract video that was basically just a bunch of cool visuals set to music.
We went crazy with the grade, using every trick in the book – color isolation, extreme contrast, even some negative image effects.
It was a blast to work on, but definitely not something you’d do for a straightforward performance video!
One thing to keep in mind is balancing your color grade with practical effects and lighting choices.
I’ve had to dial back some of my favorite grades because they clashed with the on-set lighting.
It’s all about finding that sweet spot where your grade enhances the existing look rather than fighting against it.
Here are some tips for maintaining consistency in multi-location music videos:
- Use a base grade that you can tweak for each location
- Pay attention to skin tones and keep them consistent across scenes
- Use color keys to match specific elements (like the sky or grass) across different shots
One of the biggest challenges I’ve faced is grading videos shot in multiple locations with vastly different lighting conditions.
I once worked on a video that had scenes shot in a sunny beach, a dark club, and a neon-lit street. Talk about a grading nightmare!
But with some careful balancing and a lot of patience, we managed to create a cohesive look that tied everything together.
Remember, at the end of the day, your grade should serve the video, not the other way around.
I’ve seen too many colorists get caught up in creating a “cool look” without considering whether it actually fits the song or the concept.
Always keep the big picture in mind, and don’t be afraid to simplify your grade if that’s what the video needs.
And hey, sometimes the best grade is barely noticeable.
I once spent hours on a subtle grade for an acoustic performance video, and the artist said it looked “natural and uncontrived”.
At first, I was a bit disappointed that my work wasn’t more obvious, but then I realized that was exactly what the video needed.
It’s all about enhancing the mood and the message of the music, not showing off your grading skills!
Color Grading Workflow and Best Practices
Alright, let’s talk about developing an efficient color grading workflow for music videos.
This is something I wish I’d figured out way earlier in my career – it would’ve saved me so many late nights and headaches!
Organization
First things first, organization is key. I always start by creating a solid folder structure for my projects.
Raw footage, LUTs, reference images – everything has its place. Trust me, you don’t wanna be digging through a mess of files when you’re on a tight deadline!
Basic Color Grading
Next up, I always do a first pass of basic color correction before diving into the creative grading.
It’s tempting to jump straight into the fun stuff, but getting a solid foundation will save you time in the long run.
I learned this the hard way when I once spent hours on a complex grade, only to realize the white balance was off in half the shots. Talk about a facepalm moment!
Communication
When it comes to collaborating with directors and artists on color grading decisions, communication is everything.
I always ask for reference images or videos before I start grading.
Pro Tip: Use frame grabs from your actual footage when discussing looks with the team.
I once had a director send me a bunch of moody, blue-tinted reference images, only to find out later that he just wanted more contrast, not a complete color overhaul!
Accuracy
One of the trickiest parts of color grading music videos is ensuring color accuracy across different viewing platforms and devices. It’s enough to make you pull your hair out sometimes!
Here’s what I’ve learned:
- Always check your grade on multiple screens (monitors, phones, tablets)
- Use scopes to keep your levels in check
- Don’t neglect the export settings – they can make or break your grade
I once spent days perfecting a grade, only to find out it looked completely washed out on most people’s phones.
Now, I always do a “phone check” before sending anything to the client.
Common Issues
Let’s talk about some common color grading issues in music videos and how to troubleshoot them:
- Inconsistent skin tones: Use a qualifier to isolate and adjust skin tones separately
- Blown-out highlights: Try using a highlight recovery tool or selectively bringing down the whites
- Muddy shadows: Lift the blacks slightly or use curves to add contrast to the shadow areas
One thing I’ve learned is that sometimes, less is more.
I used to go overboard with my grades, adding every cool effect I could think of.
But over time, I’ve realized that a simple, well-executed grade often looks better than a complex one.
Pro Tip: Always keep your original footage on a separate layer. That way, if you need to start over or the client wants to see the “before” version, you’re covered.
And speaking of clients, managing expectations is crucial. I always try to under-promise and over-deliver.
It’s better to surprise them with an awesome grade than to promise the moon and fall short.
Remember, developing an efficient color grading workflow takes time and practice.
Don’t get discouraged if things don’t go smoothly at first.
Every video is a chance to learn and improve your skills.
And hey, even us old pros still have days where everything seems to go wrong.
The key is to keep pushing through and learning from your mistakes.
At the end of the day, color grading is both an art and a science.
It’s about finding that perfect balance between technical accuracy and creative expression.
So keep experimenting, stay organized, and above all, have fun with it!
There’s nothing quite like seeing your grade bring a music video to life.
Conclusion
Congratulations! You’re now equipped with the knowledge and techniques to take your music video color grading to new heights in 2024.
Remember, great color grading is about more than just making your video look pretty – it’s about creating a visual experience that resonates with your audience and enhances the emotional impact of the music.
As you apply these techniques, don’t be afraid to experiment and push the boundaries of your creativity and if you want to dig deeper into the learning process take an online music video production course.
The world of music video color grading is constantly evolving, and your unique vision could be the next big trend.
So go ahead, dive into your next project, and let your colors sing!