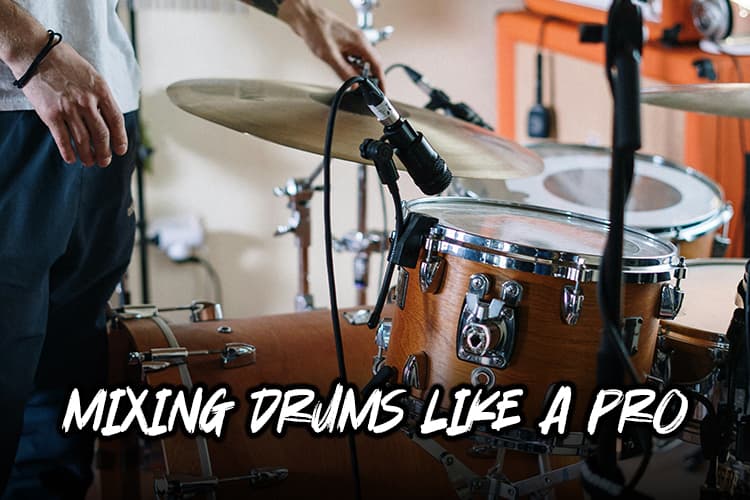
Ever listened to a track and wondered, “How do they make those drums sound so crisp and punchy?” Well, you’re in for a treat!
Mixing drums is both an art and a science, and today we’re going to dive deep and learn how to mix drums like the pros.
Most producers consider drum mixing to be the most challenging aspect of music production.
Don’t worry, though – we’ve got you covered!
Whether you’re figuring out the music production basics or you’re a seasoned studio veteran, this guide will help you take your drum mixes to the next level.
Let’s get those drums thumping!
The Basics of Drum Mixing
Let me tell you, when I first started mixing drums, I was totally lost.
Learning how to mix music as a whole and specifically mixing drums are two different beasts.
I’d sit there staring at my computer screen, wondering why my drums sounded like a mess of noise instead of the tight, punchy kit I heard in my head.
It was frustrating as hell!
But over time, I’ve learned that understanding the basics of drum mixing is crucial.
It’s like building a house – you gotta have a solid foundation, ya know?
The role of drums in a mix is huge. They’re the backbone, the heartbeat of the track. Without a solid drum mix, your whole song can fall flat.
One time, I was working on this rock track, and I couldn’t figure out why it lacked energy.
Turns out, I’d buried the drums so far in the mix, they might as well have been playing in another room!
That’s when I realized how important it is to get the balance right.
Different types of drum sounds have their own characteristics, and learning to recognize and work with these is key.
Take the kick drum, for example. It’s all about that low-end thump, right? But it also needs some high-end click to cut through the mix.
And don’t even get me started on snares – they can be bright and poppy or deep and fat, depending on the genre and the vibe you’re going for.
Here’s a quick rundown of some common drum sounds and their characteristics:
- Kick drum: Low-end thump, high-end click
- Snare: Mid-range punch, high-end crack
- Hi-hats: High-frequency sizzle
- Toms: Mid-range body, low-end depth

The thing is, it’s not just about making each individual drum sound good. The real magic happens when you get them all working together.
That’s where the importance of balance and cohesion in drum mixing comes in.
It’s like conducting an orchestra – every instrument needs to play its part, but they also need to blend together into a harmonious whole.
I remember this one time I was mixing a jazz track, and I couldn’t figure out why the drums sounded so disjointed.
I’d spent hours tweaking each individual drum, but when I played them all together, it just didn’t gel.
That’s when I realized I’d been so focused on making each drum sound perfect on its own, I’d forgotten to consider how they worked together.
So, I took a step back and started thinking about the kit as a whole.
I adjusted the levels, panned things a bit differently, and suddenly, everything clicked into place.
It was like magic! The drums went from sounding like a bunch of separate elements to a cohesive, grooving kit.
That experience taught me a valuable lesson: always listen to the drums both in isolation and in context.
It’s easy to get caught up in the details and lose sight of the big picture. But at the end of the day, it’s that big picture that matters most.
One thing I’ve learned over the years is that less is often more when it comes to drum mixing.
It’s tempting to throw every trick in the book at your drums, but sometimes, the simplest approach is the best.
A well-recorded kit with minimal processing can sound way better than an over-processed mess.
So, if you’re just starting out with drum mixing, don’t get overwhelmed.
Focus on getting the basics right – good levels, proper panning, and a balanced EQ.
Once you’ve got that down, you can start experimenting with more advanced techniques.
Trust me, your mixes will thank you for it!
Essential Tools When Learning How to Mix Drums
Alright, let’s talk about the essential tools for drum mixing.
Man, when I first started out, I was like a kid in a candy store with all these plugins. I wanted to use ’em all!
But lemme tell ya, that approach led to some pretty disastrous mixes.
Over time, I’ve learned that you really only need a handful of tools to get great drum sounds.
EQ
First up, we’ve got EQ. This bad boy is your best friend when it comes to shaping the frequency content of drum sounds.
I can’t tell you how many times EQ has saved my bacon. Like this one time, I was working on this rock track, and the snare was just getting lost in the mix.
No matter how much I cranked it, it just wouldn’t cut through.
Then I remembered the magic of EQ. A little boost around 3kHz, and bam! Suddenly that snare was poppin’ out of the speakers like it was alive.
But here’s the thing – EQ isn’t just about boosting. In fact, I’d say cutting is even more important.
It’s like sculpting, ya know? You’re chipping away the frequencies you don’t need to reveal the sound you want.
High-pass filters are your friend here. They can help clean up the low end and make room for other instruments.
Compression
Next up, we’ve got compression. Oh boy, compression. I used to be terrified of this thing. I’d slap it on a drum and suddenly it sounded like it was being played underwater. Not cool.
But once I got the hang of it, compression became my secret weapon for controlling dynamics and adding punch to drums.
The key with compression is to be subtle. You’re not trying to squash the life out of your drums – you’re just trying to even things out a bit.
Start with a low ratio, like 2:1 or 3:1, and adjust from there.
And pay attention to those attack and release times! They can make or break your drum sound.
Reverb and Delay
Now, let’s talk about reverb and delay. These effects are great for creating space and depth in your drum mix.
But be careful – it’s easy to go overboard and end up with a muddy mess. A little goes a long way here.
I remember this one time I was mixing a ballad, and I thought, “More reverb = more emotion, right?” Wrong.
I ended up with drums that sounded like they were being played in the Grand Canyon. Not exactly the intimate vibe I was going for.
Lesson learned: use reverb sparingly, and always check your mix in mono to make sure it’s not getting too washy.
Saturation and Distortion
Lastly, we’ve got saturation and distortion. These can be great for adding character and grit to your drums.
But again, subtlety is key. You’re not trying to turn your drums into a fuzz pedal (unless that’s what you’re going for, in which case, rock on!).
Here’s a quick rundown of how I typically use these tools:
- EQ: Clean up mud, boost presence
- Compression: Even out dynamics, add punch
- Reverb/Delay: Create space and depth
- Saturation/Distortion: Add character and grit
Remember, these tools are just that – tools. They’re not magic bullets that’ll instantly make your drums sound amazing.
It takes practice and a good ear to know when and how to use them effectively.
Don’t be afraid to experiment, but also don’t feel like you need to use every tool on every drum. Sometimes, less really is more.
And hey, if you’re feeling overwhelmed, don’t sweat it. We’ve all been there.
Just take it one step at a time, and before you know it, you’ll be crafting drum mixes that’ll make your speakers dance!
Preparing Your Drums for Mixing

Okay, folks, let’s talk about prepping your drums for mixing. This is something I wish someone had told me about when I was starting out.
I used to just dive right into the mix, and man, did I create some headaches for myself!
Quality
First things first: you gotta start with good source material. Whether you’re working with live drums or samples, quality matters.
I learned this the hard way when I tried to “fix it in the mix” one too many times. Trust me, no amount of processing can make a crappy drum recording sound professional.
When it comes to selecting drum samples, be picky. Don’t just grab the first kick drum you find. Listen critically.
Does it have the right character for your track? Is it punchy enough? Too boomy? Take your time here – it’ll save you a ton of work later on.
If you’re recording live drums, pay attention to your mic placement and room sound. If you have an electric drum set then you should be all good.
I once recorded a kit in my tiny, boxy bedroom and wondered why it sounded like I was hitting cardboard boxes.
Lesson learned: studio soundproofing and room acoustics matter!
Gain Staging
Now, let’s talk about gain staging. This is super important, but it’s often overlooked.
Proper gain staging is like laying a good foundation for a house. Get this wrong, and your whole mix could come crumbling down.
Here’s a quick tip: aim for your drum tracks to peak around -10 to -15 dB. This gives you plenty of headroom to work with during mixing.
I used to crank everything up to near-clipping levels, thinking louder = better. Boy, was I wrong! All I did was give myself a ton of distortion and no room to breathe in the mix.
Phase Alignment
Alright, now we’re getting into some slightly more advanced territory: phase alignment.
This is something that can make a huge difference in your drum sound, but it’s easy to overlook if you don’t know what you’re listening for.
Phase issues can occur when you’re using multiple mics on a drum kit. If the mics aren’t aligned properly, you can end up with a thin, weak sound. It’s like the audio equivalent of a blurry photo.
I remember the first time I properly aligned the phase on a multi-miked kick drum. It was like someone had suddenly turned up the “oomph” knob!
Here’s a basic process for checking phase:
- Solo your kick drum mics
- Flip the phase on one of them
- Listen for which position sounds fuller and punchier
- Repeat for other drum elements
Sample Replacement
Finally, let’s touch on sample replacement. This can be a controversial topic among purists, but in my experience, it can be a lifesaver in certain situations.
If you’ve got a great performance but a less-than-stellar drum sound, sample replacement can help you get the best of both worlds.
But here’s the thing – don’t just slap on samples willy-nilly. The goal is to enhance the original performance, not replace it entirely.
I like to blend the samples with the original sound, using the sample to add punch or clarity where needed.
Remember, the goal of all this prep work is to make your actual mixing process smoother and more effective.
It’s like mise en place in cooking – get all your ingredients prepped and ready, and the actual cooking becomes a breeze.
So take your time with this stage. Listen critically, make thoughtful decisions, and set yourself up for success.
Your future self will thank you when you’re knee-deep in the mix and everything’s just falling into place!
EQ Techniques for Crisp and Clear Drums

Alright, let’s dive into EQ techniques for drums. This is where the real magic happens, folks.
I remember when I first started messing with EQ, I was like a kid with a new toy.
I was boosting and cutting all over the place, and let me tell you, the results were… interesting, to say the least.
Cutting Frequencies
First thing’s first: identifying and cutting problematic frequencies. This is crucial.
It’s like weeding a garden – you gotta get rid of the bad stuff before the good stuff can flourish.
One time, I was working on this snare that just sounded boxy and weird. I couldn’t figure out why until I started sweeping an EQ around.
Turns out, there was this nasty resonance around 400 Hz that was muddying everything up. A little cut there, and suddenly the snare came to life!
Here’s a quick tip: use a narrow Q and boost a frequency band, then sweep it around while the drum plays.
When you hit a frequency that sounds particularly bad, that’s where you want to cut. Just remember to reduce the gain back to zero before you make the cut!
Boosting Frequencies
Now, let’s talk about boosting. This is where you can really bring out the character of each drum.
But be careful – it’s easy to go overboard here. I used to think more boost = better sound, but all I ended up with was a harsh, unnatural drum sound.
For kicks, I usually look to boost around 60-80 Hz for that low-end thump, and maybe a little around 3-5 kHz for some attack.
Snares often benefit from a boost around 200-250 Hz for body, and 3-5 kHz for crack.
Hi-hats and cymbals? A little boost around 10 kHz can add some nice sizzle.
But here’s the thing – these are just starting points. Every drum is different, and what works for one might not work for another. Trust your ears, not your eyes!
High and Low Pass Filters
Now, let’s talk about high-pass and low-pass filters. These are your secret weapons for cleaning up your drum mix.
I used to be scared of filters, thinking I’d lose too much of the sound. But used correctly, they can really help each drum sit better in the mix.
For example, I almost always throw a high-pass filter on everything except the kick drum.
You’d be surprised how much unnecessary low-end crud builds up in tom and snare mics. Cleaning that out can really help clarify your mix.
Here’s a rough guide for high-pass filter settings:
- Kick: Usually no high-pass, or very low (around 30 Hz)
- Snare: 80-100 Hz
- Toms: 50-100 Hz, depending on the size
- Overheads: 150-200 Hz
Low-pass filters can be great too, especially on things like room mics or overheads. They can help tame harsh cymbals and keep things from getting too bright and brittle.
One technique I love is using EQ to create space for each drum in the frequency spectrum.
It’s like each drum is a puzzle piece, and you’re fitting them all together.
For example, if your kick and bass are fighting for space, try cutting a bit from the bass where the kick’s fundamental is, and vice versa.
Remember, the goal isn’t to make each drum sound amazing in solo – it’s to make them all work together in the mix.
I’ve fallen into that trap before, crafting this beautiful snare sound that completely fell apart when I unmuted everything else.
Lastly, don’t forget to check your EQ moves in context with the full mix. It’s easy to get lost in soloed drums and end up with something that doesn’t work in the big picture.
EQ is powerful stuff, but with great power comes great responsibility. Use it wisely, and your drums will thank you!
Compression Strategies for Punchy Drums
Let’s talk compression, folks. This is where things can get tricky, but also where you can really bring your drums to life.
I remember when I first started using compression on drums – I thought, “The more, the better!” Boy, was I wrong.
I ended up with drums that sounded like they were being played underwater. Not exactly the punchy sound I was going for!
Attack and Release
First things first: setting attack and release times. This is crucial for getting that punchy sound we’re after.
The attack time determines how quickly the compressor kicks in, while the release time controls how quickly it lets go.
Get these wrong, and you can end up squashing all the life out of your drums.
For kick drums, I usually go for a slower attack (around 20-30ms) to let that initial transient through, and a fairly quick release (around 100-150ms) to let the compressor reset before the next hit.
This helps maintain that nice, punchy attack while evening out the body of the sound.
Snares are a bit different. I like a faster attack here (around 5-10ms) to really grab that initial hit, and a release that’s timed to the groove of the song.
Too fast, and you’ll get a choppy sound; too slow, and you’ll lose the snap of the drum.
Parallel Compression
Now, let’s talk about parallel compression. This technique is like a secret weapon for adding energy to your drums without squashing them to death.
The idea is to blend a heavily compressed version of your drums with the original, uncompressed signal.
It’s like having your cake and eating it too – you get the punch and consistency of heavy compression, but you keep the natural dynamics of the original sound.
I remember the first time I tried parallel compression. It was like a light bulb went off in my head. Suddenly, my drums had this energy and excitement that I’d been struggling to achieve.
But here’s a tip: be careful with the balance. It’s easy to go overboard and end up with a sound that’s too aggressive or unnatural.
When it comes to compression ratios, I’ve learned that less is often more.
I used to crank up the ratio, thinking it would give me more punch. In reality, all it did was suck the life out of my drums.
These days, I usually start with a ratio around 3:1 or 4:1 and adjust from there.
Remember, the goal is to control the dynamics, not eliminate them entirely.
Here’s a quick guide to compression ratios:
- Subtle compression: 2:1 to 3:1
- Moderate compression: 4:1 to 6:1
- Heavy compression: 8:1 and above
But here’s the thing – these are just starting points. Every drum and every mix is different. Trust your ears, not the numbers on the screen.
That’s a Wrap on How to Mix Drums
You’ve just taken a giant leap towards becoming a drum mixing maestro.
Remember, learning how to mix drums is a journey, not a destination. It takes practice, experimentation, and a whole lot of listening to develop your skills.
Don’t be afraid to break the rules and find your own unique sound. The most important thing is to trust your ears and have fun with the process.
So go ahead, fire up your DAW, and start mixing those drums like a pro!
Who knows? Your next mix might just be the one that makes people ask, “How did they get those drums to sound so amazing?”
Happy mixing!