Welcome to the world of home recording!
Did you know that 73% of musicians now prefer to record at home rather than in professional studios?
It’s no wonder, given the advancements in technology and the convenience of having a studio right at your fingertips.
Whether you’re a budding musician or just learning how to produce music, a podcaster, or voice-over artist, setting up a home studio can be a game-changer for your creative pursuits.
In this comprehensive guide, we’ll walk you through everything you need to know to create the perfect home studio setup.
Get ready to transform your space into a professional-grade recording haven!
Essential Equipment for Your Home Studio Setup
Let me tell you, setting up a home studio can be quite the adventure!
When I first started out, I had no idea what I was doing.
I thought I could just plug my guitar into my laptop and start making hit records. Boy, was I wrong!
Computer
The heart of any home studio setup is your computer or laptop. I
learned this the hard way when my old, beat-up laptop couldn’t handle the demands of recording. I
t would freeze up constantly, and I lost so many great takes.
Now, I’ve got a decent machine that can handle multiple tracks without breaking a sweat.
DAW
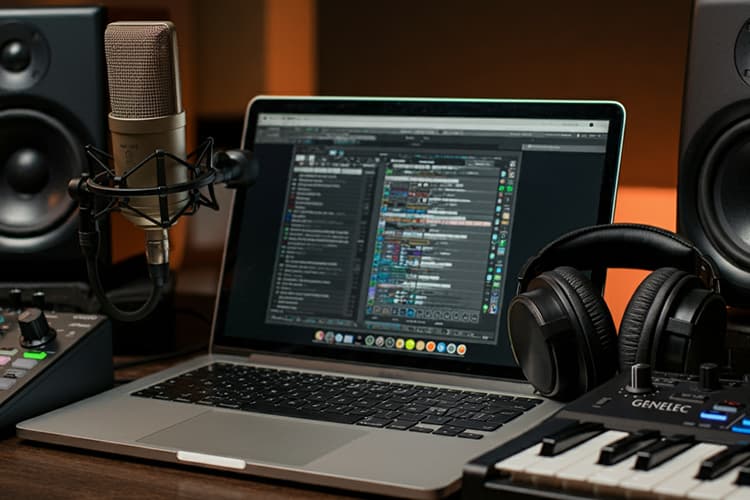
Next up is your Digital Audio Workstation (DAW) software.
This is like your virtual recording studio. I remember spending hours trying to figure out how to use my first DAW.
It was frustrating as hell, but once I got the hang of it, it was like a whole new world opened up.
Audio Interface
One of the most important pieces of gear is your audio interface.
This little box connects your instruments and mics to your computer.
I made the mistake of buying a cheap one at first, and the sound quality was awful.
Trust me, it’s worth investing in a good interface.
Microphone
Now, let’s talk about microphones for recording vocals.
You don’t need a ton of them to start, but having a few different types can really expand your recording possibilities.
I’ve got a decent condenser mic for vocals and acoustic instruments, and a couple of dynamic mics for drums and guitar amps.
Monitors
For accurate sound reproduction, you’ll need some good studio monitors.
I used to mix on my computer speakers, and let me tell you, that was a disaster.
Everything sounded great in my room, but terrible everywhere else.
Good monitors will help you make mixes that translate well to other systems.
Headphones
Don’t forget about studio headphones!
They’re essential for monitoring while recording and for those late-night mixing sessions when you don’t want to wake up the neighbors.
I’ve got a pair of closed-back headphones for recording and some open-back ones for mixing.
MIDI Controller
Lastly, a MIDI controller can be super helpful for creating and manipulating digital instruments.
I resisted getting one for a while, thinking I didn’t need it.
But once I finally got one, it made composing so much easier and more fun.
Here are a few tips I’ve learned along the way:
- Start with the basics and upgrade as you go. You don’t need everything at once.
- Research before you buy. Read reviews and watch demos to make sure you’re getting gear that fits your needs.
- Don’t skimp on cables. Cheap cables can introduce noise and reliability issues.
- Learn to use what you have before buying more gear. You’d be surprised what you can do with just a few pieces of equipment.
Remember these are just some of the music production basics, the most important thing is to make music, not to have the fanciest gear.
I’ve made some of my best recordings with just a simple home studio setup.
It’s all about being creative and working with what you’ve got!
Choosing the Right Space for Your Home Studio Setup
Picking the right space for your home studio setup can make or break your recordings. Trust me, I’ve learned this the hard way!
When I first started out, I thought I could just set up in any old corner of my house. Big mistake!
There are a few home demo recording tips to consider when selecting a room for your studio.
Size
First off, size matters. You don’t want a room that’s too small, or you’ll end up with boxy, boomy sound.
But a room that’s too big can be problematic too, with lots of echoes and reflections.
I’ve found that a medium-sized room, around 12×15 feet, works well for most home studio setups.
Shape
The shape of the room is also super important. Ideally, you want a room that isn’t perfectly square or rectangular.
These shapes can create standing waves that mess up your sound.
My current studio space is slightly irregular, with one wall at a slight angle, and it’s made a huge difference in the sound quality.
Noise
Dealing with noise isolation and soundproofing can be a real headache.
When I first set up my studio in the spare bedroom, I quickly realized that the thin walls weren’t gonna cut it.
I could hear every car driving by, and my neighbors could hear every drum beat. Not ideal!
Here are some tips for soundproofing:
- Use heavy curtains or acoustic panels on windows
- Seal any gaps around doors with weatherstripping
- Consider adding an extra layer of drywall with Green Glue in between
- Use bass traps in corners to control low-frequency build-up
Environment
Creating a comfortable and inspiring environment is crucial.
You’re gonna be spending a lot of time in this space, so make it somewhere you enjoy being.
I’ve got some cool vintage music posters on the walls and a comfy chair for those long mixing sessions.
Ventilation
One thing I wish I’d known earlier is the importance of proper ventilation.
Studios can get hot and stuffy with all the gear running, so make sure you’ve got good airflow.
I installed a quiet fan, and it’s made those marathon recording sessions much more bearable.
Lighting
Don’t forget about lighting either! Natural light is great, but you’ll also want some adjustable artificial lighting for different moods and times of day.
I’ve got a mix of overhead lights and some cool LED strips that I can change colors for different vibes.
Remember, your studio space doesn’t have to be perfect from day one. It’s an evolving process.
Start with what you’ve got and make improvements over time.
The most important thing is to create a space where you feel inspired to make music!
Acoustic Treatment for Your Home Studio Setup

Alright, let’s dive into the world of acoustic treatment. This is one area where I really messed up when I first started.
I thought I could just throw up some foam panels and call it a day. Boy, was I wrong!
Understanding room acoustics and their impact on sound quality is crucial.
When sound waves bounce around an untreated room, they create all sorts of problems like standing waves, flutter echoes, and comb filtering.
These can seriously mess up your recordings and make mixing a nightmare.
There are three main types of acoustic treatments you need to know about:
- bass traps
- diffusers
- absorption panels
Bass traps are thick absorbers that go in the corners of your room to control low-frequency build-up.
Diffusers scatter sound waves to reduce echoes and create a more even sound field.
Absorption panels soak up mid and high frequencies to reduce reflections.
When it comes to acoustic treatment, you’ve got two main options: DIY or professional solutions.
DIY
I started out going the DIY studio soundproofing route, and while it can save you some cash, it’s not always the most effective.
I spent weeks building my own panels, only to find out later that they weren’t really doing much.
That being said, there are some decent DIY options out there.
Here’s a simple absorption panel you can make:
- Build a wooden frame (2’x4′ works well)
- Fill it with rock wool insulation
- Cover it with breathable fabric
- Hang it on your wall
For diffusers, you can create a skyline diffuser using wood strips of varying lengths.
It’s a bit more complex, but can be a fun project if you’re handy.
Professional
If you’ve got the budget, professional acoustic treatments are definitely worth considering.
They’re engineered to perform better and usually look nicer too.
Plus, you can often get advice on placement from the manufacturers.
Speaking of placement, that’s super important for getting the most out of your acoustic treatments.
Here are some tips:
- Place bass traps in the corners of your room, floor to ceiling if possible
- Put absorption panels at the first reflection points on your side walls and ceiling
- Use diffusers on the back wall behind your listening position
One mistake I made was over-treating my room.
I put up so many absorption panels that my room ended up sounding dead and unnatural.
You want to find a balance between absorption and diffusion to create a lively but controlled acoustic environment.
Remember, acoustic treatment is an ongoing process. Start with the basics and add more as you go.
Listen critically to your room and make adjustments as needed.
And don’t forget, the goal isn’t to completely eliminate reflections, but to control them for a more accurate listening environment.
Trust me, once you get your room acoustics sorted out, you’ll be amazed at how much clearer your mixes sound.
It’s like taking a veil off your speakers!
Home Studio Setup Recording Area
Setting up your recording area is like creating your own little musical playground.
It’s where the magic happens, and getting it right can make a huge difference in the quality of your recordings.
I’ve had my fair share of trial and error in this department, let me tell you!
Microphone Placement
First things first, let’s talk about microphone placement. This is something I really messed up when I started out.
I thought I could just point the mic at the source and hit record. Nope! Proper mic placement is an art form in itself.
Vocals
For vocals, I’ve found that starting with the mic about 6-8 inches from the singer’s mouth usually works well.
But don’t be afraid to experiment! Sometimes moving the mic a little closer can add intimacy, while backing it off can capture more room ambience.
Acoustic Guitar
When recording acoustic guitar, I like to use two mics.
One pointed at the 12th fret for a balanced tone, and another near the body for some low-end fullness.
Blending these two signals can give you a really rich, full sound.
Vocal Booth
Creating a vocal booth or isolation area can be a game-changer, especially if you’re recording in a less-than-ideal space.
I remember trying to record vocals in my echoey living room – disaster!
Now I’ve got a little vocal booth set up in the corner of my studio using some heavy curtains and absorption panels.
It’s not perfect, but it’s way better than before.
Instrument Position
When it comes to instrument positioning, think about the sound you’re trying to capture.
For electric guitar amps, I’ve found that placing the mic slightly off-center of the speaker cone can give a nice balance of brightness and fullness.
For drums, it’s all about finding the sweet spots for each component. It takes some experimentation, but it’s worth it!
Cable Management
Cable management might not sound exciting, but trust me, it’s important.
I used to have cables strewn all over the place, and it was a nightmare.
Not only did it look messy, but it was also a tripping hazard and could introduce noise into my recordings.
Now I use cable ties and raceways to keep everything neat and tidy.
Here are some tips for organizing your recording area:
- Use a patch bay to make connecting different gear easier
- Label your cables at both ends for quick identification
- Keep a notepad handy to jot down mic placements that work well
- Use boom stands for flexibility in mic positioning
Recording Templates
One thing I wish I’d done earlier is create templates for different recording scenarios.
Now I have preset layouts for recording vocals, acoustic guitar, drums, etc.
It saves so much time and helps me get consistent results.
Remember, setting up your recording area is an ongoing process.
As you record more, you’ll figure out what works best for you and your space.
Don’t be afraid to try new things and trust your ears. After all, if it sounds good, it is good!
Optimizing Your Mixing and Monitoring Setup
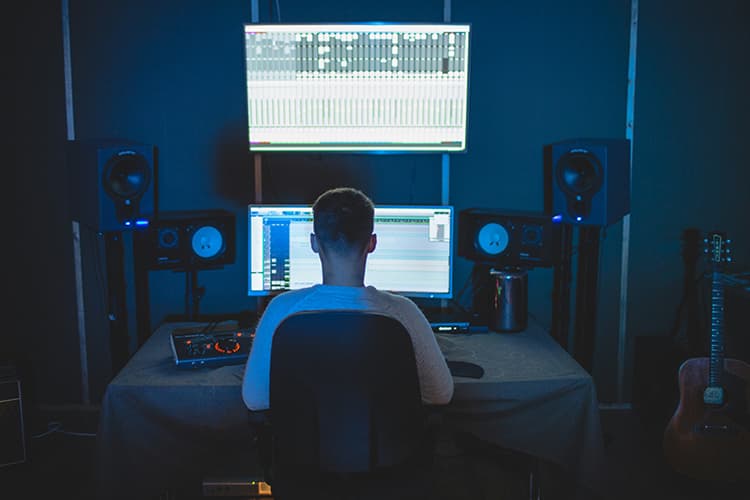
Alright, let’s talk about getting your mixing and monitoring setup just right.
This is where the rubber meets the road in your home studio setup.
I’ve made plenty of mistakes in this area, but I’ve learned a lot along the way.
Monitor Placement
First up, let’s discuss proper placement of studio monitors. This is crucial for accurate sound reproduction.
I used to have my monitors pushed up against the wall, and man, did that mess with the bass response!
Now I’ve got them pulled out a bit, forming an equilateral triangle with my listening position.
Speaking of listening position, finding that sweet spot is key.
This is where you’ll hear the most accurate representation of your mix.
I’ve found that sitting about 38% into the room from the front wall works well.
It helps avoid those pesky room modes that can color your perception of the mix.
Room Calibration
Room calibration and speaker alignment might sound fancy, but it’s really important.
I use a measurement mic and some software to analyze my room’s frequency response.
It’s amazing how much difference a few small adjustments can make.
And don’t forget to check your monitors are at ear level and angled towards your ears!
Reference Monitoring
Setting up a reference monitoring system is something I wish I’d done earlier.
It’s so helpful to have a way to check your mixes on different speakers.
I’ve got a pair of cheap computer speakers and some consumer-grade headphones that I use to simulate how most people will hear my music.
Here are some tips for optimizing your mixing setup:
- Use speaker isolation pads to decouple your monitors from your desk
- Consider using a monitor controller for easy volume adjustment and speaker switching
- Keep your mixing position symmetrical in the room if possible
- Use a spectrum analyzer to visually check your mixes
Mixing Volume
One mistake I made early on was mixing at too high a volume.
It’s tempting to crank it up, but it can lead to ear fatigue and poor mixing decisions.
Now I try to mix at conversation level most of the time, only occasionally turning it up to check the low end.
Room Treatment
Remember, room treatment plays a big role in your monitoring setup too.
Those acoustic panels we talked about earlier? They’re not just for recording – they’ll help you get a more accurate picture of your mix too.
Headphones
Don’t forget about headphones in your monitoring setup.
They’re great for checking small details and for those late-night mixing sessions.
I like to use open-back headphones for mixing as they tend to have a wider soundstage.
Rest Your Ears
Lastly, take breaks and rest your ears regularly. It’s easy to get caught up in a mix and lose perspective.
I try to take a 10-15 minute break every hour or so. It helps keep my ears fresh and often gives me new insights when I come back to the mix.
Remember, the goal of your monitoring setup is to give you an accurate representation of your mix.
It might take some time and tweaking to get it right, but it’s worth the effort. Trust me, your mixes will thank you!
Essential Software and Plugins for Home Studios
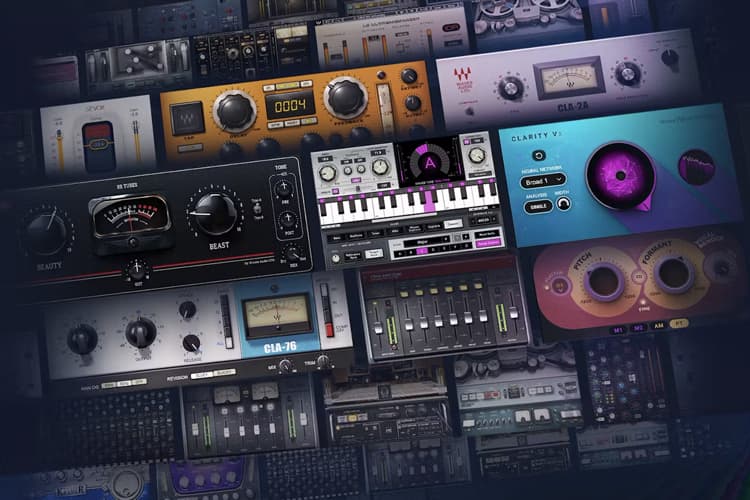
Alright, let’s dive into the digital world of home studio software and plugins.
This is where things can get really exciting… and overwhelming!
When I first started out, I was like a kid in a candy store, wanting to try every shiny new plugin I could get my hands on.
But over time, I’ve learned that it’s not about having everything, it’s about having the right tools for your needs.
DAW
First up, let’s talk about choosing the right Digital Audio Workstation (DAW) for your needs.
Wether you need software to record, mix or just beat making software there’s something for it all.
This is gonna be your main workspace, so it’s important to pick one that fits your workflow.
I started with one of the best daw for beginners, GarageBand, because it came free with my Mac, but eventually upgraded to Logic Pro.
Some other popular options are Pro Tools, Ableton Live, and FL Studio.
My advice? Download some free trials and see which one feels most intuitive to you.
Top Digital Audio Workstations:
- Pro Tools
- Logic Pro
- Ableton Live
- FL Studio
Virtual Instruments and Samples
When it comes to virtual instruments and sample libraries, the possibilities are endless.
But you don’t need to break the bank to get started.
I’ve found that having a solid piano VST, a versatile synth, and a decent drum kit can cover a lot of ground.
As you develop your style, you can add more specialized instruments.
Mixing and Matering Plugins
Now, let’s talk about essential mixing and mastering plugins.
This is where I really went overboard at first, thinking I needed every plugin under the sun.
But the truth is, you can do a lot with just a few key tools.
Here’s what I consider essential:
- A good EQ plugin (your DAW’s stock EQ is probably fine to start)
- A versatile compressor
- A reverb plugin
- A delay plugin
- A limiter for mastering
As you progress, you might want to add things like saturation plugins, multiband compressors, or specialized EQs.
But don’t feel like you need these right away.
If you’re on a budget (and let’s face it, who isn’t?), there are lots of affordable alternatives to premium software.
Some of my favorite free plugins include:
- TDR Nova (dynamic EQ)
- OTT (multiband compressor)
- Valhalla Supermassive (reverb/delay)
- Spitfire LABS (various virtual instruments)
One thing I’ve learned is that it’s better to really learn a few plugins inside and out than to have a ton of plugins you barely know how to use.
I spent way too much time jumping from plugin to plugin before I realized this.
Remember, the most important thing is your ears, not your plugins.
I’ve heard amazing mixes done with just stock plugins, and terrible mixes done with thousands of dollars worth of software.
It’s all about how you use the tools you have.
Utility Plugins
Don’t forget about utility plugins either. Things like spectrum analyzers, stereo wideners, and metering plugins can be super helpful in your mixing process.
Many DAWs come with these built-in, so explore what you already have before buying more.
Lastly, keep your plugins organized. It’s easy to end up with a cluttered mess of folders and subfolders.
I like to categorize mine by type (EQ, Compression, Effects, etc.) and keep my most-used plugins in a ‘Favorites’ folder for quick access.
Remember, building your plugin collection is a journey.
Start with the basics, learn them well, and add more as you need them. And always trust your ears over your eyes!
Conclusion
Congratulations! You’re now equipped with all the knowledge you need to create an amazing home studio setup in 2024.
Remember, building your perfect studio is a journey, and it’s okay to start small and upgrade over time.
The most important thing is to get started and let your creativity flow.
With your new home studio, you’ll be able to produce professional-quality recordings right from the comfort of your own space.
So, what are you waiting for? It’s time to bring your musical dreams to life!


