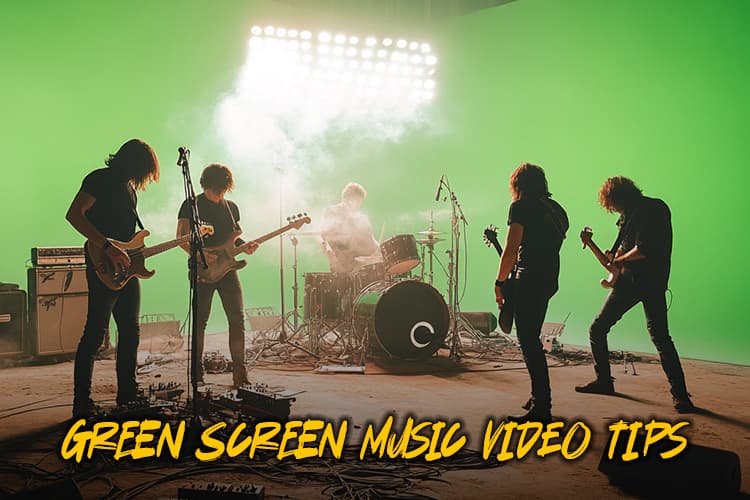
In the world of music videos, green screen technology has become a game-changer.
Did you know that over 60% of today’s top-charting music videos utilize green screen effects? It’s no wonder artists and videographers are constantly seeking ways to perfect this craft.
Whether you’re a seasoned pro or a budding director, mastering green screen techniques can transform your music videos from ordinary to extraordinary.
Let’s dive into the essential green screen music video tips that will help you create visually stunning and professionally polished productions. Get ready to take your music videos to the next level!
Understanding Green Screen Basics
Let me tell you, when I first started messing around with green screens, I was totally clueless!
I remember setting up this bright green bedsheet in my garage and thinking I was gonna make the next big music video. Boy, was I in for a surprise!
So, what’s the deal with green screen technology?
It’s pretty cool, actually. Basically, it lets you film someone in front of a solid color (usually green, duh) and then replace that color with any background you want in post-production. It’s like magic, but with computers and stuff.
One thing I learned the hard way is that choosing the right shade of green is super important.
I once used this lime green paint that looked awesome to my eyes, but the camera hated it. Turns out, you need a specific shade that’s not too bright or too dark. Who knew?
There are some weird misconceptions about green screen filming too. Like, a lot of people think you need a massive studio and expensive gear to pull it off.
Nah, that’s not true at all. You can totally do it on a budget if you’re clever about it.
Speaking of gear, here’s a quick list of the essential equipment you’ll need:
- A decent camera (doesn’t have to be fancy)
- Some good lights (more on that later)
- A green screen (duh)
- Editing software for the keying process
Trust me, you don’t need to break the bank to get started. I’ve seen some amazing low budget music videos ideas with just a smartphone and some creativity!
One time, I thought I could get away with using a bright green t-shirt as a makeshift green screen for a close-up shot. Let’s just say it didn’t work out quite like I imagined.
The wrinkles in the fabric caused all sorts of shadows and made the keying process a nightmare. Lesson learned: a proper green screen material is worth the investment!
Pro Tip: Invest in some good gaffer tape. You’ll be surprised how often you need to secure things or cover up unwanted reflections. It’s like the duct tape of the video world, I swear!
Setting Up Your Green Screen Studio
Alright, let’s talk about setting up your green screen studio.
Location
First things first, you gotta choose the right location. I made the mistake of trying to set up in my tiny bedroom once. Big mistake! You need some space to work with, trust me.
Ideally, you want a room with high ceilings and plenty of floor space. This gives you room to play around with camera angles and lighting setups. Plus, it’s way easier to move around without knocking stuff over. Been there, done that!
Lighting
Now, let’s chat about lighting. This is where a lot of people mess up, including yours truly.
You need to light that green screen evenly, or you’ll end up with a keying nightmare in post-production. I learned this the hard way when I tried to use a single desk lamp to light my entire screen. Epic fail!
Here’s a quick rundown of proper lighting techniques:
- Use soft, diffused light
- Position lights at 45-degree angles to the screen
- Aim for even illumination across the entire surface
One thing that drove me nuts when I first started was dealing with wrinkles and shadows on the green screen.
It’s like trying to iron a shirt while you’re wearing it – frustrating as hell! But I’ve picked up some tricks over the years.
First, make sure your screen is pulled tight. Use clamps or weights to keep it smooth. And here’s a little secret: a steamer can work wonders on stubborn wrinkles. Just be careful not to get it too wet!
When it comes to positioning your subject, you want them far enough away from the screen to avoid casting shadows, but not so far that they’re out of focus. It’s a balancing act, for sure. I usually go for about 6-8 feet, but it depends on your setup.
Oh, and here’s something I wish someone had told me earlier: paint your floor green too if you can. It gives you way more flexibility in post-production, especially for full-body shots.
Just be prepared for your room to look like the inside of a lime for a while!
Mastering Green Screen Lighting for Music Videos

Lighting for green screen music videos can be a real pain in the butt, let me tell you! But once you get the hang of it, it’s like unlocking a whole new level of creativity.
The key is understanding the three-point lighting setup. Sounds fancy, right?
It’s actually pretty simple.
- You’ve got your key light, which is the main source of illumination for your subject.
- Then there’s the fill light, which softens shadows and adds some detail.
- Finally, there’s the backlight, which separates your subject from the background.
It took me a while to get this right, but man, what a difference it makes!
One of the biggest headaches I had when starting out was dealing with light spill and color contamination.
You know, when the green from the screen reflects onto your subject? Ugh, it’s the worst!
Pro Tip: Use flags or gobos to control your light and prevent it from hitting the green screen. It’ll save you hours of frustration in post-production.
When it comes to lighting performers for music videos, you gotta think about matching the background scene.
I once lit a singer for what was supposed to be a sunny beach scene, but I used cool, blue-tinted lights. Big mistake!
The final composite looked totally off. Now I always consider the mood and lighting of the background when setting up my lights.
Here’s something cool I’ve learned: using practical lights in your scene can really enhance the final composite.
You know, like having a lamp or a TV screen in the shot. It adds depth and makes the whole thing look more realistic.
Just make sure they don’t interfere with your key!
Oh, and don’t forget about shadows! They can be a real pain, but they’re super important for making your subject look like they’re actually in the scene.
I use a technique called “shadow matching” where I create artificial shadows that match the lighting of the background. It takes some practice, but it’s totally worth it.
One last thing: don’t be afraid to experiment with colored lights.
I once did a music video where we used neon-colored lights to create this awesome cyberpunk vibe. It was tricky to key, but the result was mind-blowing!
Wardrobe and Makeup Considerations
Alright, let’s talk about dressing up your stars for the green screen. This is where things can get really tricky, and boy, have I made some blunders in this department!
Colors
First off, colors. You’d think it’d be obvious, but I once had a singer show up in a bright green shirt for a green screen shoot. Talk about a facepalm moment!
The general rule is to avoid anything close to the color of your screen. That means no green (duh), but also be careful with blues if you’re using a blue screen.
Here’s a quick list of colors to steer clear of:
- Green (obviously)
- Blue (can cause issues with spill)
- White (can reflect the screen color)
- Very light or pastel colors (they can pick up color spill easily)
Reflective Material
Now, let’s chat about reflective materials. Sequins, metallic fabrics, shiny jewelry – they can all be a huge pain in the neck when it comes to keying. I learned this the hard way when I had a performer wear this awesome metallic jacket. It looked great on camera, but it reflected the green screen like crazy. Nightmare!
Pro Tip: If you absolutely need to use something reflective, try angling it away from the screen. Sometimes a slight adjustment can make all the difference.
Makeup is another thing you gotta be careful with. I once had a makeup artist go all out with this gorgeous, shimmery green eyeshadow.
Looked amazing in person, but guess what? It keyed right out along with the background!
Now I always make sure to brief the makeup team on the dos and don’ts of green screen makeup.
For makeup, stick to matte finishes when possible. Avoid anything too shiny or reflective, especially on the forehead, nose, and cheekbones. And for the love of all that is holy, no green makeup!
Hair can be a real pain too, especially if it’s fine or flyaway. I’ve had many a frustrating moment trying to key out wispy hair.
One trick I’ve learned is to use a bit of hairspray to tame those flyaways. Just be careful not to go overboard – you don’t want your performer looking like they stuck their finger in a socket!
Oh, and here’s something I wish I’d known earlier: dark hair can sometimes pick up the green tint from the screen. If you’re working with someone with dark hair, try putting a dark cloth or board behind their head. It helps prevent that green halo effect.
Lastly, don’t forget about shoes! I once had a performer wear these awesome green sneakers, completely forgetting about the green screen. Half their feet disappeared in post! Now I always do a head-to-toe check before we start rolling.
Remember, the key (pun intended) is to make your subject stand out from the background, not blend in with it.
It might take some trial and error, but trust me, getting the wardrobe and makeup right will save you a ton of headaches down the line!
Camera Settings and Techniques

Alright, let’s dive into the nitty-gritty of camera settings for green screen filming.
I gotta tell ya, this is where I really messed up when I first started. I had one of the best cameras for music videos and I thought I could just point and shoot, and the magic would happen in post.
Boy, was I wrong!
ISO
First things first, let’s talk about optimal camera settings. You want to keep your ISO as low as possible to avoid noise. I learned this the hard way when I cranked up the ISO to compensate for low light, and ended up with a grainy mess that was nearly impossible to key.
Shutter Speed
Shutter speed is another biggie. As a general rule, you want it to be double your frame rate. So if you’re shooting at 24fps, set your shutter speed to 1/48. This gives you that nice, cinematic motion blur that looks natural when you composite your footage.
Frame Rate
Speaking of frame rate, choosing the right one for your music video is crucial. I usually stick with 24fps for a more film-like look, but if you’re going for a more modern, crisp feel, 30fps or even 60fps can work well. Just remember, higher frame rates mean more light needed!
Focus
Now, let’s chat about focus and depth of field. This is where a lot of people mess up, including yours truly.
You want your subject to be tack sharp, but not necessarily the green screen behind them.
I use the “1.5x rule” – focus on your subject, then stop down your aperture 1.5 stops from wide open. This usually gives a nice balance of sharpness and background separation.
Here’s a quick list of camera settings to keep in mind:
- Low ISO (ideally 100-400)
- Shutter speed = 2x frame rate
- Aperture: Use the 1.5x rule
- White balance: Set manually, not auto!
Pro Tip: Shoot in the highest bit depth your camera allows. More data means cleaner keys in post. Trust me, your editor will thank you!
Movement
Now, let’s talk about camera movements. Smooth movements are key (pun intended) for green screen shots.
Any jerky motion can make keying a nightmare. I learned this the hard way when I tried to do a handheld shot. It looked great on set, but in post? Disaster!
If you’re doing moving shots, a good tripod or slider is your best friend. And if you’re feeling fancy, motion control systems can give you repeatable movements that are a dream to work with in post.
One thing I wish I’d known earlier: shoot a clean plate. That’s just a shot of your green screen without any subjects in frame. It can be a lifesaver if you need to patch up any areas in post.
Markers
Lastly, don’t forget about markers! Put some small markers on your green screen to help with tracking in post. Just make sure they’re not too big or distracting.
I once used bright orange sticky notes and spent hours trying to remove them in post. Not fun!
Remember, the better your footage looks straight out of camera, the easier your life (or your editor’s life) will be in post-production.
It might take some practice, but getting these technical aspects right will elevate your green screen game to the next level!
Directing Performers for Green Screen Success
Alright, let’s talk about directing performers for green screen.
This is where things can get really interesting, and honestly, it’s one of my favorite parts of the whole process. But let me tell you, it ain’t always easy!
Visualization
First off, you gotta understand that performing in front of a green screen can be weird as heck for your artists.
I remember the first time I directed a music video with green screen, the singer kept looking around trying to figure out where she was supposed to be. It was like watching a cat chase a laser pointer!
The key is to help your performers visualize the scene.
I like to use reference images or even rough animations from the music video storyboard to show them what the final product will look like. It helps them get into character and understand their environment.
Eyelines
Now, let’s chat about eyelines. This is super important, especially if your performers are supposed to be interacting with elements that aren’t actually there.
I once had a rapper who was supposed to be looking at a giant robot, but he kept staring at the wrong spot. In the final video, it looked like he was having an intense conversation with thin air!
Pro Tip: Use physical markers or even standins for your performers to focus on. I’ve used everything from tennis balls on sticks to cardboard cutouts. Whatever works, right?
Boundaires
Spatial awareness is another big challenge. Your performers need to know where they can and can’t move, or they might end up “walking through” digital elements in the final composite.
I like to mark out the boundaries of the scene with tape on the floor. It’s not pretty, but it works!
Rehearse
One thing I’ve learned is that rehearsal is key.
The more comfortable your performers are with the imaginary environment, the more natural their performance will be. I always try to do a few dry runs before we start rolling.
Here’s a quick list of tips for directing green screen performances:
- Use reference images or animations
- Provide physical markers for eyelines
- Mark out scene boundaries on the floor
- Rehearse, rehearse, rehearse!
Oh, and here’s something I wish someone had told me earlier: it’s okay to do multiple takes with different actions. You can always comp them together in post.
I once had a dancer do the same routine three times in slightly different positions, and we ended up with this super cool effect where it looked like she was dancing with multiple versions of herself!
One last thing: don’t forget about reaction shots.
If your performer is supposed to be reacting to something that’ll be added in post, make sure you capture those reactions.
I once forgot to do this and ended up with a singer who looked completely unimpressed by the epic spaceship battle happening around her!
Remember, the goal is to make the final composite look as realistic as possible. That means your performers need to act as if they’re really in the scene, even if all they can see is a sea of green.
It takes practice and patience, but when it all comes together, it’s pure magic!
Post-Production: Keying and Compositing

Alright, buckle up folks, ’cause we’re diving into the wild world of post-production!
This is where the real magic happens, but let me tell you, it can also be where your dreams turn into nightmares if you’re not careful.
Keying
First things first, you gotta choose the right keying software.
There are tons of options out there, and to be honest the built-in tools in most video editing software are pretty amazing.
Take a look at:
They can all get the job done. It’s a matter of preference and what editing software you’re comfortable with.
Now, let’s talk about getting that clean key. It’s like trying to peel a stubborn sticker off a new purchase – frustrating as hell at first, but oh so satisfying when you get it right!
Here’s a basic step-by-step:
- Start with your garbage matte to isolate the area you’re keying
- Pick your key color (usually the brightest green in your shot)
- Adjust the tolerance and threshold until you get a good initial key
- Refine the matte with edge softening and choking
- Deal with any problem areas using masks or secondary keys
Sounds simple, right? Ha! If only.
I can’t tell you how many hours I’ve spent tweaking settings, color grading and trying to get rid of that stubborn green outline around my performer’s hair.
Speaking of which, edge refinement is where the pros really shine. It’s all about getting those crisp, clean edges without losing fine details.
I’ve found that a combination of light wrap and edge blending can work wonders. Just be careful not to overdo it, or your subject will look like they’re glowing!
Spill
Now, spill suppression? That’s a whole other beast. I once had an actor look like the Hulk’s cousin because I didn’t handle the green bounce light.
Pro Tip: use a spill suppression plugin or adjust your color channels. Sometimes, I’ll even add a touch of magenta to counteract that green tinge.
Matching
Matching foreground and background elements seamlessly is where the real movie magic happens.
I’ve found that lighting is key (pun intended). Try to match the lighting direction and intensity of your background plate when you shoot your green screen footage.
And don’t forget about color grading your music video – it’s a lifesaver for tying everything together.
Backgrounds
For backgrounds, I’ve used everything from stock footage to stuff I’ve shot myself. There was this one time I needed a cosmic backdrop for a space-themed video. Ended up using a close-up of glitter on black paper. Looked amazing!
When it comes to custom digital backgrounds, Adobe After Effects is my go-to.
I’ve created some trippy abstract backgrounds using fractal noise and other effects. The key is to experiment – some of my best backgrounds came from happy accidents.
Incorporating 3D elements? That’s where things get really fun.
I remember struggling with this at first, but then I discovered the magic of camera tracking. It lets you match the movement of your 3D elements to your footage. Game-changer!
Green Screen Headaches
Now, let’s troubleshoot some common green screen headaches.
Uneven lighting is the bane of my existence.
I’ve learned to use multiple soft lights and really take my time setting up. And for that annoying “green halo” effect? Tweaking the matte choker effect usually does the trick.
Fine details like hair used to drive me up the wall.
I once spent hours trying to key out an actor’s flyaway hairs. The solution? A combination of rotoscoping and core matte techniques. It’s time-consuming, but the results are worth it.
For advanced techniques, I’ve had some wild experiences with multiple green screens.
I did a music video once where we had the band playing “inside” a game console. Used one green screen for the background and another for the foreground elements. It was a nightmare to shoot, but looked awesome in the end.
Practical effects with green screen can be a blast. I love combining miniatures with green screen. Once created a “giant monster” effect by shooting a lizard on a miniature set, then compositing the band members in later. Cheap and effective!
Creating realistic reflections and shadows is all about observation. I study how light behaves in the real world and try to replicate it.
Sometimes I’ll even shoot practical elements like dust or water droplets to add to the composite.
Alright, I could go on for hours, but I think that’s enough rambling for now.
Conclusion
Armed with these green screen music video tips, you’re now ready to create visually stunning and professional-looking productions that will captivate your audience.
Remember, practice makes perfect, so don’t be afraid to experiment and push the boundaries of your creativity.
As you continue to refine your skills, you’ll find that adding a green screen to your music video production gear can opens up a world of possibilities for your videos.
So go ahead, let your imagination run wild, and bring your musical visions to life with the power of green screen magic!