Are you ready to take your music production to the next level?
Whether you’re a bedroom producer or a seasoned pro, having the right music production equipment can make all the difference in your sound.
In fact, a recent survey found that 78% of professional producers attribute their success to investing in quality gear!
But with so many options out there, how do you know what’s worth your hard-earned cash? Don’t worry – we’ve got you covered.
In this ultimate guide, we’ll explore the best music production equipment for 2024, helping you make informed decisions to elevate your tracks from good to mind-blowing!
Essential Studio Monitors for Crisp, Accurate Sound
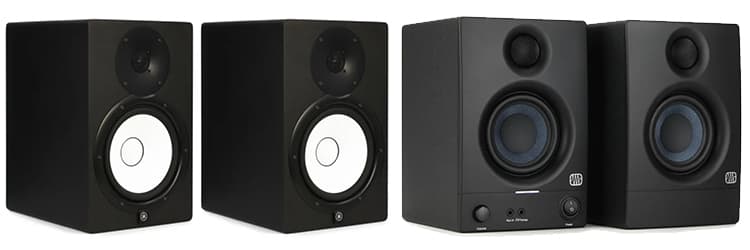
Let me tell you, when I first started out learning how to produce music, I thought my regular computer speakers would do the trick. Boy, was I wrong!
It wasn’t until I invested in a proper pair of studio monitors that I realized what I’d been missing out on. The difference was like night and day!
Flat Frequency Response
Studio monitors with a flat frequency response are crucial for getting an accurate representation of your mix.
You don’t want speakers that color the sound – that’ll only lead to nasty surprises when you play your tracks on other systems.
Trust me, I learned that the hard way when my first “finished” track sounded like mud on my friend’s car stereo!
If you’re on a tight budget, don’t sweat it. There are some great options out there that won’t break the bank.
I started with a pair of PreSonus Eris E3.5, and they served me well for years.
For those with a bit more cash to splash, the Yamaha HS8 or the Adam Audio T7V are solid choices.
Just remember, more expensive doesn’t always mean better – it’s about finding what works for your space and your ears.
Near-Field vs. Mid-Field
Speaking of space, that brings me to the whole near-field vs. mid-field debate.
In my humble opinion, for most home studios, near-field monitors are the way to go.
They’re designed to be listened to from about 3-5 feet away, which is perfect for smaller rooms.
Mid-field monitors are great if you’ve got a larger space, but for most of us, they’re overkill.
Placement
Now, let’s talk about monitor placement. This is where a lot of folks mess up – myself included!
I used to have my monitors pushed right up against the wall, and lemme tell ya, the bass build-up was insane.
Here are some quick tips I’ve picked up over the years:
- Position your monitors in an equilateral triangle with your listening position
- Keep them at ear level – I use some old textbooks to prop mine up!
- Leave some space between the monitors and the wall behind them
- Experiment with toe-in (angling the monitors slightly towards you)
Acoustics
Room acoustics are another beast entirely. I could go on for hours about bass traps and diffusers, but let’s keep it simple.
Start with some basic acoustic treatment – even just hanging some heavy curtains or putting a rug down can make a difference.
The goal is to reduce reflections and even out the frequency response of your room.
Remember, at the end of the day, the best monitors are the ones you know inside and out.
Spend time listening to music you’re familiar with on your monitors.
Learn their quirks and how they translate to other systems.
It’s not about having the most expensive gear – it’s about knowing how to use what you’ve got!
Microphones That Capture Every Nuance

Alright, let’s dive into the world of microphones!
I gotta say, choosing the right mic can be a bit overwhelming at first but it could be one of the best music production equipment pieces you buy.
There are so many options out there, it’s enough to make your head spin!
Dynamic vs. Condenser
First things first, let’s break down the big debate: dynamic vs. condenser microphones.
Now, I used to think condenser mics were always better because they’re more sensitive. But man, was I wrong about that! Each type has its own strengths.
Dynamic mics are like the tough guys of the microphone world. They can handle high sound pressure levels without breaking a sweat.
I’ve used my trusty Shure SM58 on everything from vocals to guitar amps, and it’s never let me down.
They’re great for live performances too, ’cause they’re built like tanks.
Condenser mics, on the other hand, are the sensitive souls of the bunch. They pick up all those subtle nuances in a performance.
I remember the first time I recorded acoustic guitar with a good condenser mic – I could hear my fingers sliding on the strings!
It was like a whole new world opened up.
Vocal Mics
When it comes to vocal mics, your choice really depends on the genre you’re working with.
For rock and pop, you can’t go wrong with a Shure SM7B. It’s a dynamic mic, but it’s got this wonderful warmth to it.
For more delicate genres like folk or jazz, a large-diaphragm condenser like the AKG C414 can capture all the breathy details.
Instrumentals
For instrumentalists, versatility is key. I’ve found that the Sennheiser MD421 is a real workhorse.
It sounds great on drums, guitar cabs, brass instruments – you name it!
And for a budget-friendly option that punches way above its weight, check out the Audio-Technica AT2020. It’s a condenser mic that sounds way more expensive than it is.
Budget Options
Speaking of budget-friendly options, don’t let anyone tell you that you need to spend a fortune on mics to get good results.
Some of my favorite recordings were done with mics that cost less than $100!
The Behringer XM8500 is a SM58 clone that’s dirt cheap but sounds surprisingly good.
And the MXL 990 is a great entry-level condenser that’ll give you that professional sheen without breaking the bank.
Here’s a quick rundown of some budget-friendly mics that I think punch above their weight:
- Behringer XM8500 (dynamic)
- Audio-Technica AT2020 (condenser)
- MXL 990 (condenser)
- Samson Q2U (dynamic, with USB option)
Remember, the most important thing is to practice proper vocal recording techniques, experiment and find what works for you.
Don’t be afraid to try unconventional mic placements or to use a mic in a way it wasn’t “intended” to be used.
Some of the most interesting sounds come from happy accidents!
Oh, and one last tip – invest in a good pop filter and shock mount.
They might seem like unnecessary extras, but trust me, they can make a world of difference in your recordings.
Nothing ruins a great take like plosives or handling noise!
Audio Interfaces: The Heart of Your Digital Studio
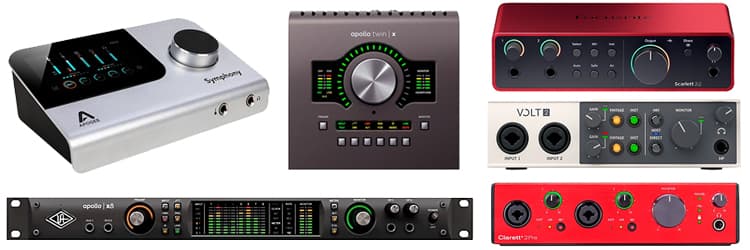
Let’s rap about audio interfaces, shall we? These little boxes are the unsung heroes of the digital studio.
I remember when I first started out, I was plugging my mic straight into my computer’s sound card. The latency was so bad, I felt like I was singing in an echo chamber!
When you’re shopping for the best audio interface, there are a few music production basics and key features you’ll want to keep an eye out for.
Inputs and Outputs
First up is the number of inputs and outputs.
Think about what you need now, but also what you might need in the future.
I made the mistake of buying a 2-in/2-out interface when I first started, and I outgrew it within a year.
Preamps
Preamp quality is another biggie.
The preamps in your interface are responsible for boosting the signal from your mic or instrument before it gets converted to digital.
Cheap preamps can add unwanted noise or coloration to your sound.
I’ve been really impressed with the preamps in the Focusrite Scarlett series – they’re clean and transparent, which is exactly what you want.
Latency
Now, let’s talk about latency.
This is the delay between when you play or sing something and when you hear it through your monitors.
High latency can make recording a real pain in the butt.
Look for interfaces with good drivers and low round-trip latency.
The Universal Audio Apollo series is amazing for this, but they’re pretty pricey.
For a more budget-friendly option, the Audient iD14 has surprisingly low latency.
Here’s a quick rundown of some interfaces I’d recommend for different needs:
- For singer-songwriters: Focusrite Scarlett 2i2
- For bands: PreSonus Studio 1824c
- For electronic producers: Native Instruments Komplete Audio 6
- For podcasters: Rode Rodecaster Pro
Future-Proofing
One thing I wish I’d known earlier is the importance of future-proofing your setup.
It’s worth spending a bit more on an interface with expandable options.
For example, interfaces with ADAT inputs allow you to add more channels later by connecting an external preamp.
Trust me, your future self will thank you!
Software
Don’t forget about music production software integration, either.
Some interfaces come bundled with DAWs or plugins, which can be a great way to get started.
The PreSonus Studio series comes with Studio One Artist, which is a solid DAW.
Pro Tip: Invest in some good quality cables! I used to think all cables were the same, but using cheap cables can introduce noise into your signal chain. You don’t need to go crazy expensive, but avoid the bargain bin stuff.
Remember, at the end of the day, the best interface is the one that meets your needs and fits your budget.
Don’t get too caught up in the specs – focus on getting something reliable that’ll let you capture your ideas without getting in the way.
Happy recording!
MIDI Controllers and Keyboards for Intuitive Composition
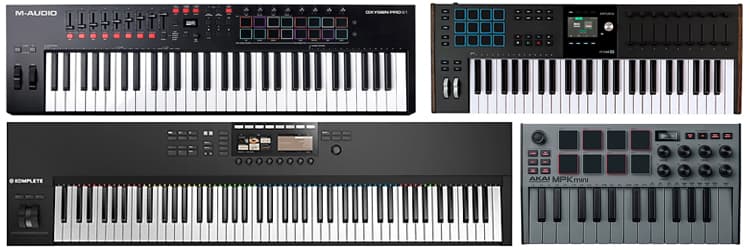
Alright, let’s dive into the world of MIDI controllers and keyboards!
Man, I remember when I got my first MIDI controller – it was like a whole new world of music opened up to me.
No more clicking notes into a piano roll with a mouse!
When you’re choosing a MIDI controller, one of the big decisions is how many keys you need.
I started with a 25-key controller, thinking it’d be enough.
But lemme tell ya, trying to play two-handed parts on that thing was like trying to do gymnastics in a phone booth!
These days, I use a 49-key controller for most stuff, and it feels just right.
Weighted Keys
Now, let’s talk about weighted vs. semi-weighted keys.
If you’re primarily a piano player, you might prefer the feel of weighted keys. They’re designed to mimic the action of a real piano.
But if you’re more into synths or you’re not used to playing piano, semi-weighted keys might be more your speed. They’re a bit lighter and easier to play fast runs on.
Personally, I’m a fan of semi-weighted keys. I find them more versatile for different types of sounds.
But hey, that’s just me – you gotta go with what feels right for your playing style.
Integration
Integrating your MIDI controller with your DAW can be a bit of a headache at first.
I remember spending hours trying to get my first controller to play nice with my software!
Most modern controllers are pretty plug-and-play these days, but it’s worth checking out some YouTube tutorials for your specific controller and DAW combo.
Pro Tip: Take some time to map your controller’s knobs and faders to frequently used parameters in your DAW. Being able to tweak filters or adjust volume without reaching for the mouse can really speed up your workflow.
Features
Some of the latest MIDI controllers have some pretty cool innovative features.
I’m loving the Arturia KeyLab mkII series – they’ve got these little LCD screens above the knobs that show you what parameter you’re controlling. No more guessing games!
The Novation Launchkey series is great if you use Ableton Live.
They’ve got these cool scale modes that light up the keys in the scale you’re working in.
It’s a game-changer for coming up with melodies, especially if you’re not a trained keyboard player.
For those on a budget, the Akai MPK Mini series packs a lot of features into a compact, affordable package.
You get keys, pads, and knobs all in one little unit. It’s perfect for making beats and music on the go.
Here’s a quick rundown of some MIDI controllers I’d recommend:
- For beginners: Akai MPK Mini
- For Ableton users: Novation Launchkey
- For piano players: Native Instruments Komplete Kontrol S-Series
- For maximum control: Arturia KeyLab mkII
Remember, the best MIDI controller is the one that inspires you to make music.
Don’t get too caught up in the specs – focus on finding something that feels good to play and fits your workflow.
And don’t be afraid to try out different controllers at your local music store before you buy.
Happy composing!
Headphones: Your Secret Weapon for Detailed Mixing
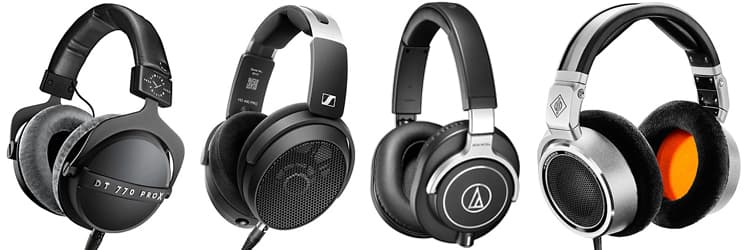
Let’s chat about headphones, shall we?
These babies are like your secret weapon for detailed mixing.
I can’t tell you how many times I’ve caught little details or mistakes in my mixes that I totally missed on my monitors.
Open-Back vs. Closed Back
Now, when it comes to headphones for mixing, you’ve got two main types: open-back and closed-back.
Each has its own strengths, and ideally, you’d have both. But let’s be real, most of us aren’t made of money!
Open-back
Open-back headphones are great for mixing because they give you a more natural, spacious sound.
It’s like the audio equivalent of sitting in a room with your monitors.
I love my Sennheiser HD 600s for this – they’re like a comfy old pair of slippers for my ears.
Closed-back
Closed-back headphones, on the other hand, are your go-to for recording.
They prevent sound from leaking out, which is crucial when you’re tracking vocals or instruments.
Plus, they’re better for working in noisy environments.
The Audio-Technica ATH-M50x are a popular choice here – they’re built like tanks and sound great.
Mixing and Mastering
When it comes to mixing and mastering, you want headphones that are as neutral and accurate as possible.
The Beyerdynamic DT 1990 Pro are fantastic for this, but they’re a bit pricey.
For a more budget-friendly option, the AKG K702 are hard to beat.
Comfort
Comfort is key when you’re in for a long mixing session.
I once made the mistake of buying a pair of headphones that looked cool but felt like they were trying to squeeze my brain out of my ears after an hour. Not fun!
Look for headphones with plush ear cups and an adjustable headband.
The Beyerdynamic DT 770 Pro are super comfy – I can wear them for hours without fatigue.
Budget Options
Now, let’s talk about some budget-friendly alternatives that don’t compromise on quality.
The Audio-Technica ATH-M40x are like the little brother of the M50x, and they’re a steal for the price.
The Sennheiser HD 280 Pro are another solid choice – they’re not the most exciting headphones in the world, but they’re accurate and built to last.
Here’s a quick list of my top headphone picks:
- For mixing: Sennheiser HD 600 (open-back)
- For recording: Audio-Technica ATH-M50x (closed-back)
- For mastering: Beyerdynamic DT 1990 Pro (open-back)
- Budget option: Audio-Technica ATH-M40x (closed-back)
Remember, no matter what headphones you choose, it’s important to take regular breaks and check your mixes on different systems.
Headphones can give you a detailed view of your mix, but they don’t tell the whole story.
Use them in conjunction with your monitors for the best results.
Pro Tip: Invest in a decent headphone amp if you can. It can make a big difference, especially with high-impedance headphones.
The Schiit Magni is a great affordable option that’ll make your headphones sing!
Studio Accessories That Make a Big Difference
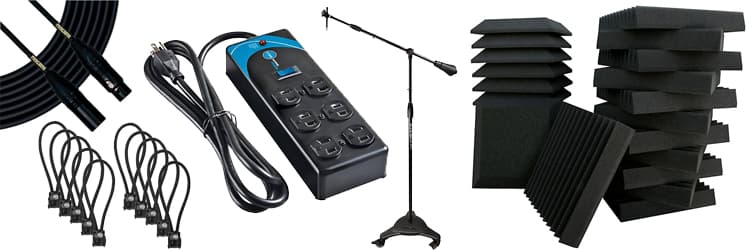
Alright, let’s wrap this up by talking about those little studio accessories that can make a big difference.
You know, the unsung heroes of the home studio setup.
Trust me, these things might seem small, but they can have a huge impact on your workflow and sound quality.
Cables
First up, let’s chat about cables and adapters.
I used to think all cables were created equal, but boy, was I wrong!
Investing in some good quality cables can really clean up your signal chain.
And don’t even get me started on the frustration of not having the right adapter when you need it.
I always keep a few extra XLR, TRS, and MIDI cables on hand, along with a bunch of different adapters.
You never know when you might need to connect something weird!
Acoustic Treatment
Now, let’s talk about acoustic treatment. This is one area where a little can go a long way.
You don’t need to cover every inch of your walls with foam to make a difference.
Start with the basics – some bass traps in the corners and some absorption panels at the first reflection points.
I made my own panels using rock wool insulation and some cheap wooden frames.
They’re not pretty, but they work!
If you’re on a tight budget, even hanging some heavy curtains or putting down a thick rug can help tame those pesky reflections.
And don’t forget about diffusion – a bookshelf filled with books of different sizes can act as a pretty decent diffuser.
Monitor stands and isolation pads are another game-changer.
Getting your monitors at the right height and angle can make a huge difference in how accurately you hear your mix.
And isolation pads help decouple your monitors from whatever surface they’re sitting on, reducing unwanted vibrations.
I use the IsoAcoustics stands, and they’re fantastic.
Here’s a quick list of some studio accessories I think are worth investing in:
- Cable ties or velcro straps for cable management
- A good quality power strip with surge protection
- A monitor controller for easy volume adjustment
- A headphone amplifier for better headphone performance
- A decent microphone stand (cheap ones will drive you crazy!)
Cable management is something that often gets overlooked, but it can make your studio so much more pleasant to work in.
Nothing kills the creative vibe like tangled cables all over your workspace.
Final Thoughts on the Best Music Production Equipment
There you have it – our comprehensive guide to the best music production equipment for 2024!
Remember, while having top-notch gear is important, it’s your creativity and skills that truly make the magic happen.
Start with the essentials and gradually build your setup as you grow.
Don’t be afraid to experiment and find what works best for your unique style.
Now, armed with this knowledge, it’s time to hit the studio and create some chart-topping tracks.
Who knows? Maybe next year, we’ll be featuring your music as an example of what’s possible with the right music production equipment and a whole lot of talent.
Happy producing!


