Hey there, aspiring producers and home recording enthusiasts!
Are you tired of hearing your neighbor’s dog barking in the background of your latest track? Well, you’re not alone.
A ton of home studio owners struggle with unwanted noise? But don’t worry – I’ve got your back!
In this guide, we’ll explore innovative and wallet-friendly DIY studio soundproofing techniques that’ll have you recording like a pro in no time.
Let’s dive in and make some noise… or rather, prevent it!
Understanding the Basics of Soundproofing
Let me tell ya, when I first started building my home recording studio setup, I had no clue about soundproofing.
I mean, I thought throwing a bunch of egg cartons on the wall would do the trick. Boy, was I wrong!
Sound Absorption and Isolation
When I started learning music production basics it took me a while to figure out the difference between sound absorption and sound isolation.
Sound absorption is all about soaking up those pesky echoes and reverberations inside a room.
It’s like when you’re in a big, empty hall, and your voice bounces all over the place.
Sound isolation, on the other hand, is about keeping sound from traveling between rooms.
Think of it as creating a little sound bubble for yourself.
Mass, Damping and Decoupling
Now, let’s talk about the key principles: mass, damping, and decoupling.
These are the holy trinity of soundproofing, I swear.
Mass is pretty straightforward – the more mass you’ve got, the harder it is for sound to penetrate.
Damping is all about reducing vibrations, kinda like those shock absorbers on your car.
And decoupling? That’s when you separate surfaces to prevent sound from traveling through them.
I remember this one time I thought I had it all figured out.
I’d added a ton of mass to my walls, but I could still hear my neighbor’s dog barking like it was in the room with me.
Turns out, I’d forgotten about those sneaky sound transmission paths.
Sound is like water – it’ll find any little crack or gap to seep through.
- Walls
- Floors
- Ceilings
- Doors
- Windows
- Electrical outlets
These are all potential weak spots in your soundproofing armor.
And don’t even get me started on flanking paths – that’s when sound takes a detour around your carefully soundproofed walls through the ceiling or floor.
It’s not all doom and gloom though! Once you understand these basics, you’re well on your way to creating a decent recording space.
Just remember, it’s a process. You’re not gonna get it perfect on the first try, and that’s okay.
Heck, I’m still tweaking my setup years later!
One thing I wish someone had told me earlier is that perfect soundproofing is pretty much impossible, especially in a home studio.
Unless you’re building a professional recording studio from scratch with the best music production equipment, you’re always gonna have some compromise.
The key is to focus on the most problematic areas and make improvements where you can.
So, don’t get discouraged if you can still hear some outside noise after your first attempts at soundproofing.
It’s all about making incremental improvements. And trust me, even small changes can make a big difference in your recordings.
Just keep at it, and before you know it, you’ll be recording vocals like a pro – or at least, without your neighbor’s dog as an unwanted backup singer!
Assessing Your Studio Space
Alright, so you’ve got the basics down, and now you’re ready to tackle your own space. This is where the rubber meets the road, folks!
The first step in any DIY soundproofing project is figuring out exactly what you’re dealing with.
Trust me, I learned this the hard way when I dove headfirst into “soundproofing” my first studio without really understanding the issues.
Identify
start with identifying problem areas and sound leaks.
This is like being a sound detective – you gotta get in there and really listen.
I remember spending an entire afternoon just sitting in my room, ears perked up like a cat, trying to pinpoint where the noise was coming from.
It’s not glamorous, but it’s necessary!
Pro Tip: Get a friend to walk around outside your studio space making noise while you listen inside.
It’s amazing how quickly you’ll spot those weak points in your sound isolation.
Windows are often the biggest culprits – I once realized I could hear my neighbor’s conversation clear as day through a tiny gap in my window frame!
Measure
Now, when it comes to measuring room acoustics, you don’t need to go out and buy a bunch of fancy equipment.
Sure, professional acoustic analysis tools are great, but there are plenty of simple ways to get a good idea of what’s going on in your space.
One DIY method I love is the clap test.
Yep, it’s exactly what it sounds like – you stand in the middle of your room and clap loudly. Listen to how the sound decays.
If you hear a lot of flutter echo (that rapid ping-pong sound), you’ve got some work to do on your mid and high-frequency absorption.
Bass
For bass issues, try playing a sine sweep through your monitors.
This is just a tone that gradually changes from low to high frequencies.
Listen for any points where the volume suddenly increases – these are your room’s resonant frequencies, and they’re gonna need some attention.
Be Realistic
When it comes to setting realistic goals for your DIY project, this is where a lot of folks trip up. I know I did!
I had visions of creating a perfect anechoic chamber in my spare bedroom. Spoiler alert: it didn’t happen.
The key is to focus on the most problematic issues first.
Is external noise your biggest concern? Then prioritize sound isolation.
Are you dealing with a boomy, echoey room? Then absorption should be your focus.
Remember, you’re not trying to create a professional recording studio (unless you are, in which case, you might wanna call in the pros).
For most home studios, the goal is to create a space that’s good enough for recording and mixing without driving you (or your neighbors) crazy.
- Identify the most annoying noise sources
- Focus on the frequency ranges that are causing the most trouble
- Set achievable goals based on your budget and space constraints
One thing I wish I’d known earlier is that acoustics is as much art as science.
You can do all the calculations in the world, but sometimes you just gotta trust your ears. If something sounds good to you, it probably is good!
And hey, don’t forget to have fun with it!
Soundproofing might seem like a chore, but it’s actually a great opportunity to get creative and really make your space your own.
Who knows, you might even enjoy the process… well, maybe not the part where you’re stuffing insulation into wall cavities, but you get the idea!
Budget-Friendly Materials for DIY Studio Soundproofing
Okay, let’s talk about the elephant in the room – money.
When I started looking into soundproofing, I nearly had a heart attack at the prices of some professional acoustic treatments.
But don’t worry, I’ve got your back!
There are plenty of budget-friendly options that can make a real difference in your studio’s sound.
First up, let’s talk about recycled and upcycled options.
This is where you can really flex your creative muscles and save some serious cash.
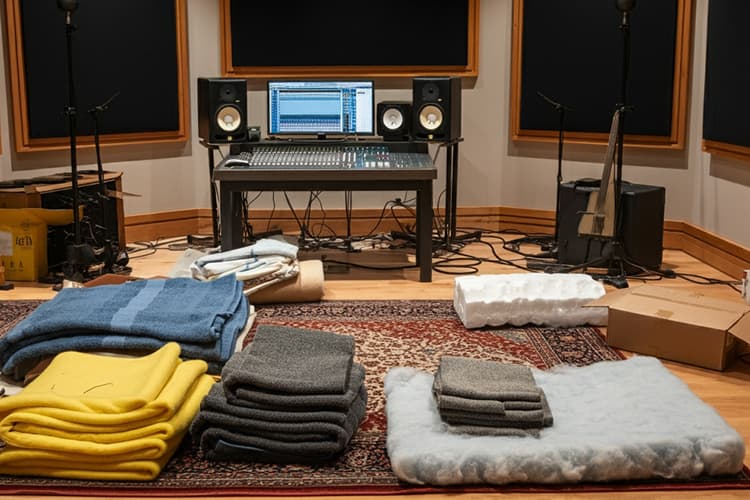
One of my favorite DIY projects was turning old moving blankets into acoustic panels.
They’re dense, they absorb sound well, and they cost next to nothing if you can get them second-hand.
Another great option is using old towels or clothes.
I once made a pretty effective bass trap out of a bunch of old t-shirts stuffed into a frame.
Was it pretty? Not really. Did it work? You bet!
Now, when it comes to affordable alternatives to professional acoustic treatments, there are a few tricks I’ve learned over the years.
Egg crate foam might not be the most effective sound absorber, but it’s cheap and can help with high-frequency reflections.
Just don’t rely on it for serious soundproofing!
One material I swear by is mineral wool insulation.
It’s not as cheap as some options, but it’s way more affordable than professional acoustic foam and works like a charm for DIY panels and bass traps.
- Moving blankets
- Old towels and clothes
- Egg crate foam
- Mineral wool insulation
- Carpet remnants
- Cardboard boxes (yes, really!)
When it comes to sourcing materials locally and online, don’t be afraid to think outside the box. I’ve found some great deals at:
- Local hardware stores (look for sales on insulation)
- Thrift shops (great for fabric and old blankets)
- Online marketplaces (you’d be surprised what people are giving away)
- Carpet stores (ask about remnants – they’re often super cheap)
One time, I scored a bunch of acoustic foam for free from a recording studio that was upgrading their equipment. It never hurts to ask around!
Remember, the key is to be creative and resourceful.
You don’t need top-of-the-line materials to make a significant improvement in your studio’s sound.
Heck, I once used a bunch of old paperback books as diffusers.
Did it look weird? Absolutely. Did it work? Well… kinda!
Just keep in mind that while DIY solutions can be great, they might not be as fire-resistant as professional materials.
So always prioritize safety, especially if you’re using fabric or foam.
And hey, don’t get too caught up in making everything perfect.
Sometimes, a less-than-ideal solution that’s actually implemented is way better than a perfect solution that never gets done because it’s too expensive or complicated. Trust me, I’ve been there!
So go ahead, raid your closets, hit up those thrift stores, and start experimenting.
You might be surprised at how much you can improve your studio’s sound with just a little creativity and elbow grease.
And if all else fails, well… there’s always the classic “hang a bunch of blankets everywhere” approach.
It might not be pretty, but it’ll do in a pinch!
Sealing Gaps and Cracks
Alright, folks, let’s talk about one of the most crucial aspects of soundproofing that often gets overlooked – sealing those pesky gaps and cracks.
I can’t tell you how many times I’ve seen people spend a fortune on fancy acoustic panels only to forget about the tiny gaps letting sound slip through like a ninja in the night.
First things first, let’s chat about the importance of airtight spaces for sound isolation.
Here’s the deal: sound is sneaky. It’ll find any little opening and use it to escape or enter your studio.
I learned this the hard way when I thought I’d soundproofed my room perfectly, only to realize I could still hear my roommate’s TV through a tiny gap under the door. Facepalm moment, right there!
So, what’s the secret to sealing windows and doors?
Well, I’ve tried a bunch of DIY techniques over the years, and let me tell you, some worked better than others.
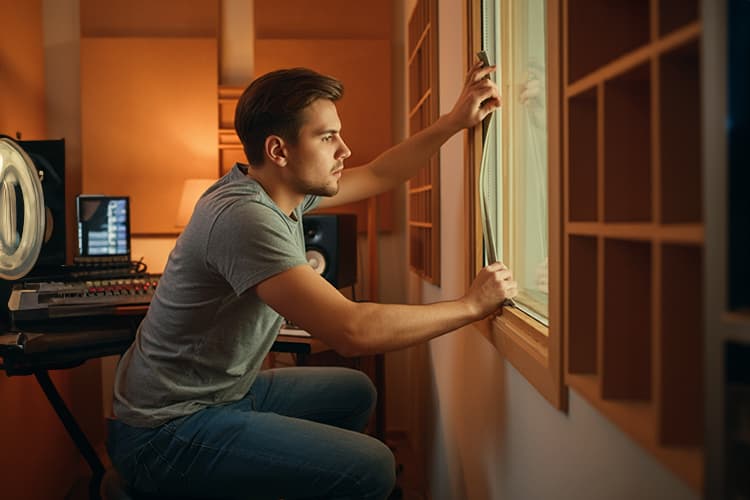
For windows, my go-to solution is a combination of weatherstripping and window plugs.
Weatherstripping is great for sealing the edges when the window’s closed, but for serious sound isolation, you might want to consider making removable window plugs.
Here’s a quick and dirty guide to making a basic window plug:
- Measure your window
- Cut a piece of rigid foam insulation to fit
- Cover it with fabric for aesthetics
- Add handles for easy removal
Trust me, these things work wonders! Just pop ’em in when you’re recording and take ’em out when you want some natural light.
Now, let’s talk doors. The gap under the door is often the biggest culprit for sound leakage.
I used to stuff towels under there like some kind of sound-obsessed maniac.
But then I discovered the magic of door sweeps. These babies attach to the bottom of your door and create a seal when it’s closed. Game changer!
When it comes to using weatherstripping and acoustic caulk effectively, there are a few tricks I’ve picked up.
First off, don’t skimp on quality. I once bought the cheapest weatherstripping I could find, and it fell off after a week. Lesson learned!
For weatherstripping, make sure you clean the surface thoroughly before applying. And when you’re putting it on, stretch it slightly as you go. This helps it create a tighter seal.
As for acoustic caulk, this stuff is amazing for sealing up small cracks and gaps. Just remember, a little goes a long way.
I once got a bit overzealous and ended up with caulk everywhere. Not my finest moment!
Here are some key areas to focus on when sealing:
- Around window frames
- Door frames
- Where walls meet the floor and ceiling
- Around electrical outlets and light switches
- Any visible cracks in walls or ceilings
One last tip: don’t forget about your HVAC vents! These can be major sound transmitters.
You might want to consider adding some soundproofing material inside the ducts, or even building a sound maze for the air to travel through.
Remember, achieving perfect sound isolation is tough, especially in a home studio. But every little bit helps.
So grab that caulk gun, slap on some weatherstripping, and start sealing! Your recordings (and your neighbors) will thank you.
And hey, if all else fails, you can always try my patented “pillow fort” method. Just kidding… unless?
Creating Mass with DIY Acoustic Panels
Alright, let’s dive into one of my favorite DIY soundproofing projects – making your own acoustic panels.
Trust me, once you get the hang of this, you’ll be whipping up panels like a pro baker makes cookies!
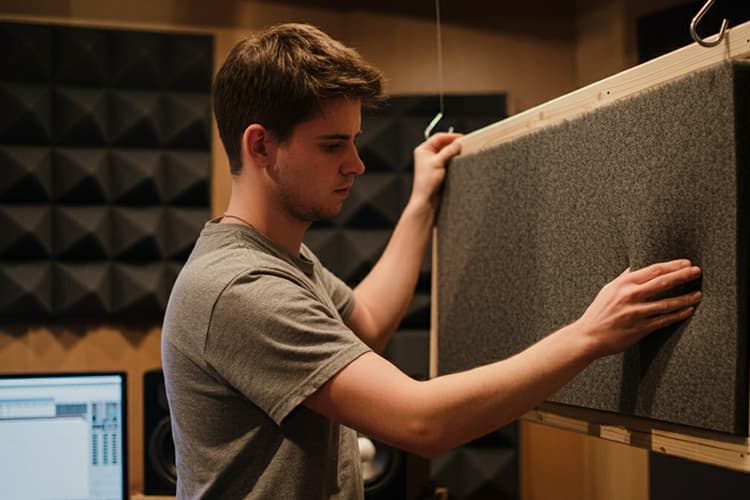
First off, let me give you a step-by-step guide to building your own panels.
I remember my first attempt… let’s just say it involved a lot of hot glue and swearing.
But I’ve refined the process over the years, and now it’s pretty straightforward.
- Build a wooden frame (I use 1×4 boards)
- Cut insulation to fit inside the frame
- Wrap the whole thing in fabric
- Attach hanging hardware
Sounds simple, right? Well, there are a few tricks to getting it just right.
For example, make sure your insulation is slightly thicker than your frame.
This creates a slight bulge when you wrap it, which looks more professional and helps with sound absorption.
Now, let’s talk about choosing the right fabric and insulation materials. This is where a lot of folks get tripped up.
For insulation, I swear by mineral wool. It’s affordable, effective, and doesn’t shed like fiberglass.
Plus, it’s fire-resistant, which is always a bonus when you’re dealing with electronics.
As for fabric, you want something that’s acoustically transparent. This means sound can pass through it easily.
I learned this the hard way when I used some thick upholstery fabric on my first panels.
Looked great, but didn’t do squat for the sound!
Some good fabric options include:
- Burlap
- Muslin
- Speaker grille cloth
- Lightweight cotton
Just make sure you can blow air through it easily. If you can’t, sound won’t be able to either.
When it comes to optimal placement for maximum effectiveness, there’s a bit of an art to it.
Generally, you want to focus on first reflection points. These are the spots where sound from your speakers hits a surface and bounces back to your ears.
To find these points, sit in your listening position and have a friend move a mirror along the walls.
When you can see your speakers in the mirror, that’s a first reflection point. Bam! Stick a panel there.
Other key areas to consider:
- Corners (great for bass traps)
- Behind your listening position
- On the ceiling above your mix position
One mistake I made early on was covering every inch of my walls with panels. Turns out, you can have too much of a good thing! You want some reflections in your room, just controlled ones.
Pro Tip: Vary the thickness of your panels. Thicker panels (4 inches or more) are great for controlling lower frequencies, while thinner ones (2 inches) work well for highs and mids.
Remember, creating mass is key to effective soundproofing.
These panels might not block sound from entering or leaving your room, but they’ll do wonders for controlling reflections and improving the overall sound quality within your space.
And hey, don’t be afraid to get creative with your panel designs!
I once made a bunch of hexagonal panels that looked like a giant honeycomb on my wall.
Not only did it sound great, but it was also a pretty cool conversation starter.
So go ahead, grab some tools, and start building.
Before you know it, you’ll have a room full of professional-looking acoustic panels that didn’t cost you an arm and a leg.
And trust me, your recordings will thank you!
Tackling Bass Traps on a Budget
Alright, folks, let’s dive into the world of bass traps.
Now, I know what you’re thinking – “Bass traps? Sounds expensive and complicated!”
But trust me, it doesn’t have to be. I’ve been there, done that, and I’m here to share some budget-friendly wisdom.
First off, let’s talk about understanding low-frequency issues in small spaces.
When I first started recording in my tiny spare room, I couldn’t figure out why my mixes sounded great in there but turned to mud everywhere else.
Turns out, I was dealing with some serious bass buildup in the corners.
You see, low frequencies are tricky little devils.
They’ve got long wavelengths, which means they need a lot of space to fully develop.
In small rooms, they tend to bunch up in the corners, creating all sorts of problems.
It’s like trying to fit an elephant into a phone booth – something’s gotta give!
Alright, let’s keep this DIY train rolling!
Here’s how we can tackle those pesky bass issues without breaking the bank:
DIY Corner Bass Traps: The Secret Weapon
Now, I’m not saying you need to go out and buy a truckload of fancy acoustic foam (though if you’ve got the cash, go for it). Nah, we’re gonna get creative here.
Remember those old blankets your grandma was about to throw out? Grab ’em!
Thick, dense materials are your best friends in this battle against the bass.
Here’s a quick and dirty method I’ve used with great success:
- Grab some sturdy cardboard tubes (think carpet rolls or those giant mailing tubes).
- Stuff ’em full of those old blankets, towels, or even recycled denim insulation if you’re feeling fancy.
- Stand these bad boys up in the corners of your room, floor to ceiling if you can manage it.
Boom! You’ve just created your very own broadband absorbers on the cheap. They might not win any beauty contests, but they’ll start taming those low-end beasts.
The Bookshelf Hack
Here’s another trick that’ll make your inner audio nerd and bookworm equally happy.
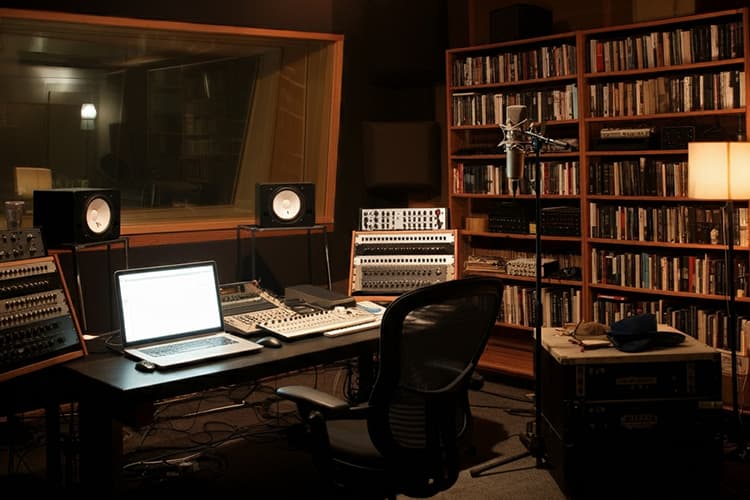
Fill a bookshelf with books of varying sizes and place it along one of your walls.
The uneven surface created by the different-sized books helps to diffuse sound waves, while the mass of the books themselves absorbs some of that low-end energy.
Plus, it’s a great excuse to finally organize your Stephen King collection. Win-win!
The Magic of Positioning
Now, let’s talk about the cheapest solution of all – it won’t cost you a dime, just a bit of sweat equity. I’m talking about strategic positioning.
Experiment with the placement of your studio monitors and listening position.
Sometimes, moving your setup just a foot or two can make a world of difference.
It’s like finding that sweet spot on the couch – once you’re there, everything just feels right.
Try the “38% rule” – place your listening position about 38% of the way into the room from the wall behind you.
It’s not foolproof, but it’s a good starting point to avoid those nasty bass nulls and peaks.
Remember, folks, perfect is the enemy of good.
You don’t need a NASA-level acoustically treated room to start recording and mixing music.
Start with these budget-friendly tips, trust your ears, and keep making noise!
Final Thoughts on DIY Studio Soundproofing
And there you have it, folks – genius ways to soundproof your studio without emptying your wallet!
Creating a professional-quality recording space is a journey, not a destination.
Start with these DIY studio soundproofing techniques, and you’ll be amazed at how much you can improve your sound without breaking the bank.
So go ahead, get your hands dirty, and let your creativity soar in your newly soundproofed studio.
Who knows? Your next big hit might be just around the corner – and this time, without any unwanted background noise!
Happy recording!


