In the world of music videos, the difference between amateur and professional-looking footage often comes down to one crucial tool: the gimbal camera stabilizer.
Did you know that 73% of viral music videos use stabilized footage?
That’s right! Whether you’re an aspiring director or a musician looking to elevate your visual game, mastering the art of gimbal stabilization can transform your music videos from shaky to spectacular.
In this guide, we’ll dive into everything you need to know about gimbal camera stabilizers for music videos in 2024.
Get ready to add some smooth moves to your musical masterpieces!
Understanding Gimbal Camera Stabilizers for Music Videos

Let me tell you, when I first started learning how to make music videos, I was all over the place – literally! My footage looked like it was shot during an earthquake.
That’s when I discovered the magic of gimbal camera stabilizers.
These bad boys are like a magic wand for smooth footage and a great tool to add to your music video production gear.
So, what exactly is a gimbal camera stabilizer? Well, it’s basically a fancy handheld device that uses motors and sensors to keep your camera steady as you move around.
It’s like having a mini robot assistant that’s constantly adjusting your camera to keep it level and smooth. Trust me, it’s a game-changer for music videos.
Back in the day, we used to rely on things like shoulder rigs or Steadicams for stabilization. And don’t get me wrong, those still have their place.
But gimbals? They’re on a whole other level. They’re lighter, more versatile, and give you a buttery smooth look that’s perfect for those dynamic music video shots.
I remember the first time I used a gimbal on a low budget music video. Man, the difference was night and day!
Suddenly, I could follow the artist around, weave through the crowd, and even do some crazy circular shots – all without making the audience feel like they’re on a rollercoaster.
The impact on music video quality is huge. Smooth footage just looks more professional, plain and simple.
It allows the viewer to focus on the artist and the visuals, rather than getting distracted by shaky camera work.
Plus, it opens up a whole new world of creative possibilities. You can do these epic one-take shots that would’ve been impossible before.
Now, let’s break down the key components of a camera gimbal system:
- The handles: This is where you hold the gimbal and control its movement.
- The motors: These bad boys do the heavy lifting, constantly adjusting the camera’s position.
- The control unit: The brains of the operation, processing data from sensors to keep everything stable.
- The mounting plate: Where you attach your camera to the gimbal.
Getting to know these parts is crucial for using a gimbal effectively.
I learned that the hard way when I first tried to balance my camera on a gimbal. It was like trying to solve a Rubik’s cube blindfolded!
One thing to keep in mind is that not all gimbals are created equal.
Some are designed for smartphones, others for DSLRs, and some for big cinema cameras.
Make sure you choose one that’s compatible with your setup.
Battery life is another factor to consider.
I once had a gimbal die on me in the middle of a crucial shot. Talk about a rookie mistake!
Now I always carry spare batteries and a charger.
But here’s the thing – a gimbal isn’t a magic fix-all.
You still need to know how to move smoothly and plan your shots. It’s just a tool, albeit a really cool one.
It took me a while to get the hang of it, but once I did, it totally revolutionized my music video production.
So, if you’re serious about stepping up your music video game, investing in a good gimbal camera stabilizer is definitely worth considering.
Just be prepared for a bit of a learning curve – and maybe a few frustrated moments as you figure out how to balance your camera perfectly.
But trust me, once you get it down, you’ll wonder how you ever shot without one!
Top Gimbal Camera Stabilizers for Music Video Production in 2024
Alright, let’s talk about the cream of the crop when it comes to gimbal camera stabilizers for music videos in 2024.
I’ve been through my fair share of gimbals over the years, and let me tell you, the technology just keeps getting better and better.
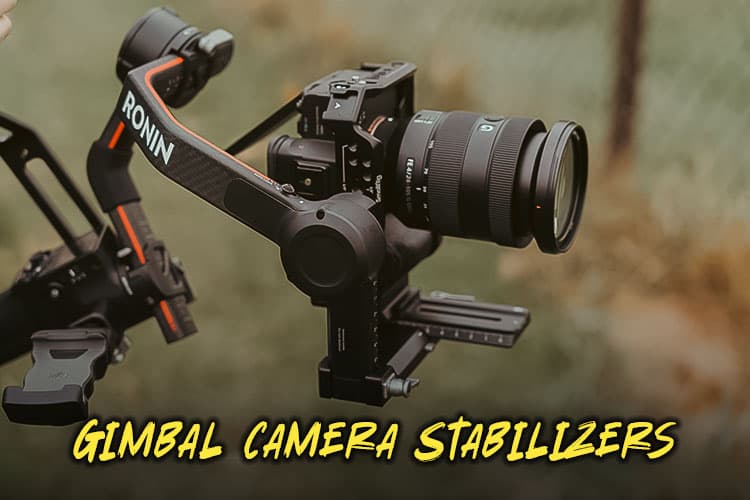
1. DJI Ronin series

First up, we’ve got the DJI Ronin series. These bad boys have been dominating the market for years, and for good reason.
The latest model, the Ronin 5, is a beast. It’s got insane stability, can handle pretty heavy camera setups, and has some cool automated modes that are perfect for music videos.
I used one for a rock band’s video last month, and the way it handled the chaotic energy of the performance was mind-blowing.
Pros:
- Excellent build quality and reliability
- Wide range of models for different camera sizes and uses
- Advanced features like ActiveTrack and wireless control
- Good battery life
- Intuitive user interface
Cons:
- Can be expensive, especially for higher-end models
- Heavier than some competitors
- Some users find the setup process complex
Price range: $400 – $4,000+ (depending on the specific model)
2. Zhiyun

Zhiyun has really stepped up their game with the Weebill 3.
It’s more compact than the Ronin, which is great for those tight backstage shots or when you’re weaving through a crowd.
Plus, it’s a bit more budget-friendly, which is always a plus in my book.
Speaking of budget-friendly options, let’s talk about some gimbals that won’t break the bank.
Pros:
- Generally more affordable than competitors
- Lightweight and portable designs
- Good battery life
- User-friendly interface
- Variety of models for different camera types
Cons:
- Build quality may not match premium brands
- Some models have limited payload capacity
- Customer support can be inconsistent
Price range: $100 – $1,200 (depending on the model)
3. Moza Air 2S

The Moza Air 2S is a solid choice for indie artists and videographers who are just starting out.
It’s not as feature-packed as some of the higher-end models, but it gets the job done and then some. I actually started out with a Moza, and it served me well for years.
Pros:
- Good balance of features and affordability
- Decent payload capacity
- Long battery life (up to 20 hours)
- Intuitive controls and smartphone app
- Built-in quick release plate
Cons:
- Less brand recognition than DJI or Zhiyun
- Fewer advanced features compared to high-end competitors
- Limited ecosystem of accessories
Price range: $400 – $600
4. Freefly MōVI Pro

Now, if you’re working on high-end music video productions and money is no object, you might want to check out the Freefly MōVI Pro.
This thing is the Rolls-Royce of gimbals. It’s got incredible payload capacity, super smooth operation, and some advanced features that’ll make your jaw drop.
I got to use one on a big-budget pop video last year, and it was like operating a piece of art.
Pros:
- Professional-grade stabilization
- High payload capacity
- Extremely smooth footage
- Advanced features like time-lapse and dual-operator mode
- Robust build quality
Cons:
- Very expensive
- Heavy and less portable than other options
- Steep learning curve
- Overkill for casual users or smaller cameras
Price range: $5,000 – $7,000
Here’s a quick rundown of some key features to compare:
- Weight capacity
- Battery life
- Smart shooting modes
- Ease of setup and balancing
- Compatibility with different camera systems
When it comes to music video-specific needs, you want to look for gimbals that have good dynamic movement capabilities.
Those sweepin’ shots that follow the beat of the music? That’s where a good gimbal shines.
I remember this one time I was shooting a country music video with a cheaper gimbal, and every time the bass hit, you could see this little shake in the footage.
Lesson learned – invest in quality if you can!
But here’s the deal – the best gimbal for you depends on your specific needs and budget.
Pro Tip: Don’t feel like you need to drop a fortune on a top-of-the-line model if you’re just starting out. Start small and work your way up as your skills and client base grow.
One thing I’ve learned over the years is that it’s not just about the gear – it’s how you use it.
I’ve seen people create amazing music videos with entry-level gimbals, and I’ve seen people with top-tier music video equipment produce mediocre results.
It’s all about practice, creativity, and understanding your tools.
Oh, and a word to the wise – always read reviews and maybe even rent before you buy.
I once impulse-bought a gimbal based solely on its specs, only to find out it had this annoying motor whine that ruined all my audio. Facepalm moment for sure!
Remember, at the end of the day, the gimbal is just a tool to help you bring your creative vision to life.
Whether you’re working with a thousand-dollar setup or a budget model, what really matters is the story you’re teling and how you’re using the gimbal to enhance the music and visuals.
So, do your research, consider your needs and budget, and choose the gimbal that’s right for you.
And most importantly, have fun with it!
There’s nothing quite like nailing that perfect smooth shot that perfectly complements the music. It’s what makes this job so dang rewarding!
Essential Features to Look for in a Gimbal Camera Stabilizer

When it comes to choosing the right gimbal camera stabilizer for your music video productions, there are some key features you absolutely can’t ignore. Trust me, I’ve learned this the hard way over years of trial and error!
Weight
First up, let’s talk about weight capacity and camera compatibility. This is crucial, folks.
You need to make sure your gimbal can handle the weight of your camera setup.
I remember this one time I tried to mount my hefty cinema camera on a gimbal meant for DSLRs. Big mistake!
The poor thing was struggling like me trying to do a one-arm push-up. Not pretty. Most gimbals will list their maximum payload.
Pro Tip: Go for one that can handle a bit more than your current setup. That way, you’ve got room to grow and add accessories.
Battery Life
Now, let’s chat about battery life and power management. This is something that can make or break your shoot.
Picture this: you’re in the middle of an amazing one-take music video, the artist is nailing it, everything’s perfect… and then your gimbal dies. Facepalm. I’ve been there, and it’s not fun.
Look for gimbals with at least 8-12 hours of battery life. And always, ALWAYS carry spare batteries.
I keep mine in a little fanny pack – not the most fashionable, but hey, it’s saved my butt more times than I can count!
Balance
Next up: axis locks and balance adjustments.
These are super important for getting your gimbal set up quickly and keeping it balanced throughout the shoot.
Good axis locks will help you maintain your balance when you’re switching between different shots or movements.
I remember struggling with a gimbal that had really finicky balance adjustments. It was like trying to solve a Rubik’s cube while riding a unicycle. Not fun.
Look for gimbals with tool-less adjustment knobs and clear markers for different balance positions.
Smart Shooting
Now, let’s talk about some of the fun stuff – smart shooting modes. These can really add some pizzazz to your music videos.
Features like:
- Time-lapse mode
- Motion-lapse mode
- 360° roll
- Sport mode for fast-moving subjects
These can help you create some really dynamic and interesting shots that’ll make your music videos stand out.
Just don’t go overboard – I once got a little too excited with the 360° roll and ended up making my viewers seasick. Oops!
Control
Another feature to consider is the control system. Some gimbals come with joysticks, others with touchscreens, and some can even be controlled via smartphone apps.
It’s really about personal preference here. I like having physical buttons for quick adjustments, but I know plenty of folks who swear by touchscreen controls.
Noise
Oh, and don’t forget about noise!
Some gimbals can be pretty noisy, which is a real pain if you’re trying to capture live audio.
I learned this the hard way when I ruined a beautiful acoustic performance with the sound of my gimbal’s motors whirring away.
Quality
Lastly, consider the build quality and durability of the gimbal.
You’re gonna be lugging this thing around to all sorts of locations, so it needs to be able to take a beating.
I once had a gimbal that couldn’t handle a little drizzle during an outdoor shoot. Let’s just say it didn’t end well for either of us.
Remember, the perfect gimbal for you is the one that fits your specific needs and shooting style.
Don’t get too caught up in having all the bells and whistles if you’re not gonna use ’em.
And most importantly, once you get your gimbal, practice, practice, practice!
Even the fanciest gimbal in the world won’t do you any good if you don’t know how to use it properly.
Now go forth and create some smooth, buttery music video magic!
Gimbal Camera Stabilizer Techniques for Dynamic Music Videos

Alright, let’s dive into the nitty-gritty of using your gimbal to create some seriously awesome music videos.
I’ve spent years honing these techniques, and let me tell you, it’s been a wild ride!
Movements
First things first, let’s talk about the basic movements: pan, tilt, and roll. These are your bread and butter, folks.
Panning is moving the camera horizontally, tilting is moving it vertically, and roling is… well, roling it.
Sounds simple, right? But mastering these movements takes practice.
I remember when I first started out, my pans looked like I was swatting flies. Smooth was not in my vocabulary.
Pro Tip: Start slow. Like, really slow. Slower than you think you need to. It’s all about control and consistency.
Advanced Techniques
Now, let’s talk about some advanced techniques that’ll really make your music videos pop.
Orbit Shot
One of my favorites is the orbit shot. This is where you move around your subject in a circular motion.
It’s perfect for those dramatic chorus moments or for showcasing a 360-degree view of your artist.
Here’s how I do it:
- Find your subject (usually the artist)
- Start moving sideways while keeping the camera pointed at the subject
- Gradually increase your speed as you get comfortable
- Keep your movements smooth and consistent
Trust me, when you nail this shot, it’s pure magic!
Dolly Zoom
Another technique I love is the dolly zoom. This is where you move the camera towards or away from the subject while zooming in the opposite direction.
It creates this trippy, disorienting effect that can be perfect for those psychedelic bridge sections or to emphasize a key lyric.
Fair warning though, this one takes some practice.
The first time I tried it, I ended up with footage that looked like it was shot during an earthquake.
Not exactly the vibe I was going for!
Choreographing
One technique that’s really important for music videos is choreographing your camera movements to match the music.
This is where the art of videography meets the rhythm of the song.
I like to listen to the track a bunch of times before the shoot and plan out my movements.
For example, during verses, I might use smoother, more subtle movements.
But when that chorus hits? That’s when I’ll bust out the more dynamic shots – maybe an orbit or a dramatic push in.
Here’s a little trick I use: I actually count the beats in my head while I’m shooting.
It helps me time my movements perfectly with the music. 1-2-3-4, pan left. 5-6-7-8, tilt up.
It might look a little silly if anyone’s watching me, but hey, whatever works, right?
Now, let’s chat about transitions.
This is where a lot of people struggle with gimbals.
You want your movements between shots to be as smooth as butter.
Whip Pan
One technique I love is the whip pan. This is where you quickly pan from one subject to another.
When done right, it creates this cool blurred effect that can transition seamlessly into your next shot.
But here’s the catch – you need to commit to that movement. Half-hearted whip pans just look… well, half-hearted. Go all in!
The Reveal
Another transition technique I like is the reveal.
This is where you start with your camera pointing at something uninteresting – maybe a wall or the ground – and then smoothly move to reveal your subject. It’s great for building anticipation.
Remember, the key to all these techniques is practice.
I can’t tell you how many hours I’ve spent in my backyard, filming my dog and pretending he’s a rock star. (He’s very patient.)
Oh, and one more thing – don’t be afraid to get low or go high with your gimbal.
Some of the most interesting shots come from unexpected angles. Just be careful not to bonk your talent on the head. (Yes, I’ve done that. No, the artist wasn’t thrilled.)
Lastly, remember that while all these techniques are cool, they should serve the song, not overshadow it.
It’s easy to get carried away with fancy moves, but at the end of the day, your job is to enhance the music, not distract from it.
So get out there, practice these techniques, and most importantly, have fun with it!
There’s nothing quite like the feeling of nailing that perfect shot that makes the music come alive visually. You’ve got this!
Pairing Your Gimbal Stabilizer with the Right Camera Setup
Alright, let’s talk about finding the perfect dance partner for your gimbal – your camera setup. This is crucial, folks.
You could have the fanciest gimbal in the world, but if your camera setup isn’t right, you’re gonna have a bad time.
First things first, let’s chat about the best cameras for gimbal-stabilized music videos.
Now, I’m not gonna tell you there’s one perfect camera – it really depends on your style and budget. But I can give you some pointers based on my experience.
For a long time, I was all about DSLRs.
They’re versatile, relatively affordable, and can produce some gorgeous footage.
The Canon 5D Mark IV was my go-to for years. But lately, I’ve been leaning more towards mirrorless cameras like the Sony A7 series. They’re lighter, which is a big plus when you’re lugging a gimbal around all day.
I remember this one time I tried to use a massive cinema camera on a smaller gimbal. Bad idea.
It was like trying to balance an elephant on a tightrope.
Lesson learned: make sure your camera’s weight is well within your gimbal’s payload capacity.
Now, let’s talk about lenses. This is where things get really interesting.
Your lens choice can make or break your gimbal shots. Generally, you want to go for lighter lenses to keep your overall setup manageable.
I’m a big fan of prime lenses for music videos.
They’re typically lighter and faster than zoom lenses, which is great for low-light situations (hello, moody lighting!).
A 35mm or 50mm prime can be your best friend for gim
Conclusion
Congratulations! You’re now equipped with the knowledge to transform your music videos using gimbal camera stabilizers.
Remember, the key to stunning visuals lies in the perfect blend of technology and creativity.
As you embark on your next music video project, let your imagination soar while your gimbal keeps things grounded.
Whether you’re capturing the energy of a live performance or crafting a narrative masterpiece, your gimbal will be your trusty sidekick in the quest for cinematic excellence.
So, what are you waiting for? Grab that gimbal, hit record, and let the music move you – and your audience – like never before!