Did you know that 86% of music video directors consider storyboarding the most crucial pre-production step? Welcome to the vibrant world of the music video storyboard – where creativity meets strategy, and your wildest musical dreams come to life on paper before they hit the screen.
Whether you’re a seasoned director or an artist looking to visualize your next hit, this guide will transform your approach to music video creation. Let’s dive in and unlock the secrets to crafting storyboards that will have your audience hitting replay again and again!
What is a Music Video Storyboard?
Let me tell ya, music video storyboarding is a game-changer! I remember my first attempt at directing a music video without a proper storyboard – what a disaster that was. Picture this: a bunch of confused musicians, a crew that had no idea what we were shooting next, and me, running around like a headless chicken trying to piece it all together. Never again!
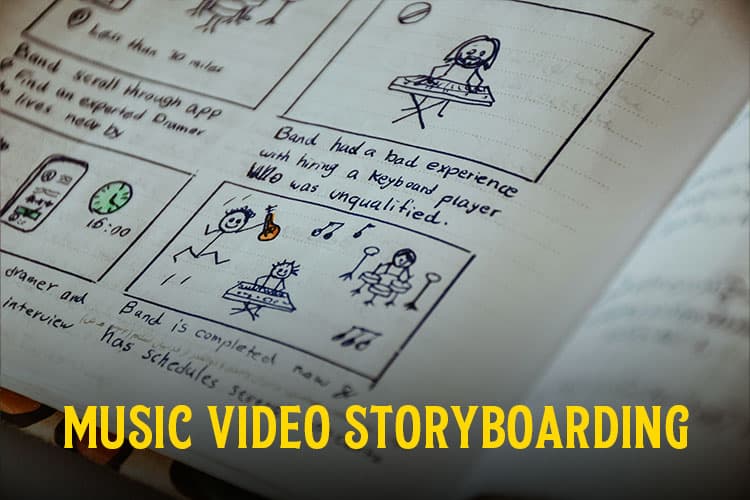
Storyboarding for music videos is basically like creating a comic book version of your video before you shoot it. It’s a visual roadmap that helps everyone involved understand what the heck is going on. Trust me, it’s a lifesaver when you’re trying to explain your crazy ideas to a bunch of skeptical band members or a grumpy cinematographer.
Now, here’s the thing about music video storyboards – they’re a whole different beast compared to storyboarding for movies or TV shows. With music videos, you gotta sync everything to the beat and mood of the song. It’s like trying to choreograph a dance, but with cameras and props instead of dancers. And let me tell you, it can be a real head-scratcher sometimes!
One time, I was working on a video for this indie rock band, and I had this brilliant idea for a slow-motion sequence during the bridge. Looked great on paper, but when we tried to match it to the actual music? Total train wreck. Lesson learned: always consider the rhythm of the song when you’re sketching out your ideas.
The cool thing about storyboards is how they help you communicate your vision to everyone involved. I’ve had moments where I thought I was being crystal clear about what I wanted, only to realize halfway through the shoot that the makeup artist thought we were going for a completely different vibe. Now, I make sure to include notes about everything – from lighting to costume details – right there on the storyboard. Saves a ton of headaches later on!
But here’s the real kicker – storyboards aren’t just about pretty pictures. They’re a crucial tool for planning your shoot efficiently. When you’ve got a tight budget and limited time (and trust me, in the music video world, you always do), a well-thought-out storyboard can be the difference between wrapping up on schedule and having to beg the location owner for “just one more hour, please!”
So, if you’re thinking about diving into music video production, do yourself a favor and embrace the storyboard. It might seem like extra work upfront, but I promise you, it’ll save your bacon when you’re on set and the clock is ticking.
Plus, there’s something kinda magical about seeing your ideas come to life, even if it’s just in rough sketches at first. It’s like watching your own little music video movie before you’ve even picked up a camera!
Essential Tools for Music Video Storyboarding
Alright, let’s talk tools of the trade! When it comes to music video storyboarding, you’ve got options – like, a lot of options. It can be pretty overwhelming at first, but don’t sweat it. I’ve been through the wringer with this stuff, and I’m gonna break it down for you.
First up, we’ve got the age-old debate: traditional vs. digital storyboarding. Now, I’m gonna be real with you – I started out as a die-hard pencil-and-paper guy. There’s something about the tactile feel of sketching that just gets my creative juices flowing. But man, when I discovered digital storyboarding tools, it was like a whole new world opened up!
Software
I was working on a storyboard for a pop music video with a ton of quick cuts and transitions. I’d been hunched over my sketchpad for hours, eraser shavings everywhere, when my assistant suggested I try this digital storyboarding app. I was skeptical at first, but holy moly, it was a game-changer! Being able to easily move scenes around, duplicate shots, and add quick notes right on the digital canvas? Absolute lifesaver.
Now, if you’re going the digital route, there are a bunch of software options out there. Some of the popular ones include:
Personally, I’m a big fan of Storybard Hero – it’s user-friendly and gets the job done without too many bells and whistles. But hey, every artist has their own preference, so it’s worth trying out a few to see what clicks for you.
For those of you who prefer the old-school approach (and trust me, there’s still a place for it), here’s my must-have list for hand-drawn storyboards:
- A sturdy sketchpad – don’t cheap out on this, you want something that can take a beating
- A variety of pencils – I like to have a range from 2H to 6B for different shading effects
- A good eraser – trust me, you’ll be using this a lot!
- Colored markers or pencils – great for highlighting important elements or adding quick color notes
- A ruler – because sometimes, you just need a straight line, y’know?
Pro Tip: Always, ALWAYS have a backup of your storyboards.
I once spilled coffee all over my only copy of a storyboard the night before a big pitch meeting. Let’s just say it was a long, panicky night of redrawing everything from memory. Not fun!
One thing to keep in mind, whether you’re going digital or traditional, is that your storyboarding style should match the vibe of the music video you’re planning. For a gritty, indie rock video, rough sketches might be perfect. But if you’re working on a slick pop video with lots of effects, you might want to use more detailed, polished storyboards.
At the end of the day, the best tool for music video storyboarding is the one that helps you communicate your ideas most effectively. Don’t get too hung up on having the fanciest software or the most expensive art supplies. I’ve seen amazing storyboards drawn on napkins and mind-blowing ones created with top-of-the-line digital tools. It’s all about what works for you and helps bring your vision to life.
Just remember, the storyboard is a means to an end, not the end itself. The goal is to create a kickass music video, so use whatever tools help you get there. And hey, if all else fails, there’s always the trusty stick figure approach. Sometimes, simplicity is key!
Step-by-Step Guide to Creating a Music Video Storyboard
Alright, buckle up, ’cause we’re about to dive into the nitty-gritty of creating a music video storyboard! This is where the magic happens, folks. I’ve been through this process more times than I can count, and let me tell you, it never gets old.
Get Familiar with the Song
First things first, you gotta really get into the song. I mean really get into it. I’m talking about listening to it on repeat until your neighbors start giving you dirty looks. One time, I was working on a storyboard for this crazy electronic dance track, and I must’ve played it a hundred times in a row. By the end, I was hearing beats in my sleep, but man, did I know that song inside and out!
As you’re listening, start identifying those key moments. You know, the parts that make you wanna jump up and dance, or grab a lighter and sway (do people still do that?). These are gonna be your anchor points in the video. I like to jot down timestamps and quick notes about what I’m feeling or seeing in my head for each section.
Brainstorm
Now here’s where it gets fun – brainstorming visual concepts. This is where you can really let your imagination run wild. Don’t hold back! I once had this idea for a video where we would use a green screen and the singer would be floating through space on a giant slice of pizza. The artist thought I was nuts at first, but it ended up being their most popular video. So yeah, embrace the weird!
Start Sketching
Once you’ve got your ideas flowing, it’s time to start sketching. Now, I know what you’re thinking – “But I can’t draw to save my life!” Trust me, I’ve been there. My first storyboards looked like they were drawn by a drunk chimp. But here’s the secret – it doesn’t matter! As long as you can get your idea across, that’s what counts. Stick figures are totally fine if that’s what works for you.
Start with rough sketches of each major scene. Don’t worry about details at this point – just get the basic composition down. I like to use a grid layout, with each box representing a different shot or scene. It helps me visualize how the whole video will flow together.
Add Detail
Once you’ve got your rough sketches, it’s time to refine them. This is where you start adding more detail, thinking about camera angles, and really bringing your vision to life. I remember working on a video where we had this complex choreography sequence. I must’ve redrawn those dance moves a dozen times before I got them right!
Now, here’s a crucial step that a lot of people overlook – adding notes. And I’m not just talking about a few scribbles here and there. You want to be as detailed as possible. Camera movements, transitions, special effects – write it all down! I once thought I could remember all the details of a complicated effects shot without writing them down. Big mistake. When it came time to shoot, I couldn’t for the life of me remember what I had planned. Lesson learned!
Don’t forget to think about the pacing of your video. You want it to match the rhythm and energy of the song. I like to use different sized panels in my storyboard to represent longer or shorter shots. It’s a visual way to see how the pacing will work.
Review
Finally, take a step back and look at your storyboard as a whole. Does it tell a story? Does it capture the essence of the song? If not, don’t be afraid to go back and make changes. I’ve torn up entire storyboards and started from scratch because something just wasn’t clicking.
Remember, storyboarding is a process. It might take a few attempts to get it right, and that’s okay! The important thing is that by the end, you have a solid visual plan for your music video. Trust me, when you’re on set and everything’s running smoothly because everyone knows exactly what they’re doing, you’ll be thanking your past self for putting in the effort on that storyboard!
Incorporating Visual Storytelling Techniques
Okay, let’s talk about taking your music video storyboard from good to mind-blowingly awesome! This is where we get into the really fun stuff – visual storytelling techniques. Trust me, once you master these, your videos will be the talk of the town (or at least the internet).
Symbolism
First up, let’s chat about symbolism and metaphors. These are your secret weapons for adding depth to your video without hitting people over the head with your message. I remember working on this video for a breakup song, and instead of going with the cliché of someone crying into a pillow, we used the image of a wilting flower throughout the video. It was subtle, but man, did it pack an emotional punch!
But here’s the thing – you gotta be careful not to go overboard with the symbolism. I once got so caught up in creating these elaborate metaphors that the artist watched the finished storyboard and said, “Uh, what’s this got to do with my song about partying on the beach?” Oops. Lesson learned: make sure your clever symbols actually relate to the song!
Pacing
Now, let’s talk about matching visual pacing to the rhythm and mood of the song. This is crucial, folks! You want your visuals to dance with the music, not fight against it. I like to think of it as choreographing for the camera. For upbeat songs, I’ll plan lots of quick cuts and dynamic camera movements. For slower, more emotional tracks, I lean towards longer, smoother shots.
One time I was working on a storyboard for these really intense EDM artists. I had all these ideas for crazy, rapid-fire visuals. But when I showed it to the DJ, he pointed out that I’d totally missed the massive drop in the middle of the song. I had to go back and rework the whole middle section to build up to this epic visual moment that matched the musical climax. It was a headache at the time, but man, the end result was worth it!
Balance
Balancing performance shots with narrative elements is another key skill to master. You want to showcase the artist, of course, but you also want to tell a story. I like to think of it as a dance between the two elements. Maybe you start with a narrative scene, then cut to the artist performing as the chorus kicks in, then back to the story. It’s all about finding that perfect rhythm.
One technique I love is using match cuts to transition between the performance and narrative scenes. Like, maybe your story character is reaching for something, and you cut to the artist making a similar motion while performing. It creates this really cool visual flow that ties everything together.
Pro Tip: Don’t be afraid to get abstract! Some of the coolest videos I’ve worked on have been the ones where we took a more artistic, less literal approach.
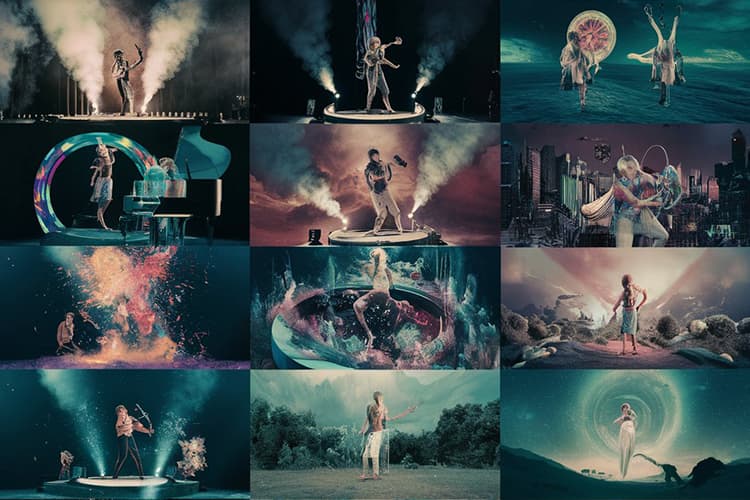
Like this one video where we represented the verses with these surreal, animated sequences, and then snapped back to reality for the chorus. It was trippy as hell, but it totally worked with the vibe of the song.
Remember, at the end of the day, you’re trying to create a visual experience that enhances the music. Sometimes that means a straightforward narrative, sometimes it means a series of striking, seemingly unconnected images. It all depends on the song and the artist.
Color
And hey, don’t forget about color! I always make notes about color palettes in my storyboards.
Color can be such a powerful tool for setting mood and tying different elements of your video together.
I once did a video where we gradually shifted the color palette from cool blues to warm reds as the song built up.
It was subtle, but it really helped underscore the emotional journey of the track.
Once you get to post production you can also use color grading to compliment your color palette,
Artists Brand
Lastly, always keep the artist’s image and brand in mind. You want your visual storytelling to feel authentic to who they are. I’ve had to scrap some of my favorite ideas because they just didn’t fit with the artist’s vibe. It can be frustrating, but at the end of the day, you’re there to help the artist tell their story, not just to show off your cool ideas.
So there you have it – my crash course in visual storytelling for music videos. Now go forth and create some visual magic!
Collaborating with Artists and Labels
Alright, let’s get real for a minute. Collaborating with artists and labels can be… interesting, to say the least. It’s like trying to herd cats sometimes, but when it works, it’s pure magic. I’ve had my fair share of triumphs and face-palm moments, so let me break it down for ya.
Collaborating with the Artist
First things first, involving the musician in the storyboarding process is crucial. I mean, it’s their baby, right? Their music, their vision. But here’s the tricky part – some artists have a crystal clear idea of what they want, while others are like, “I dunno, just make it cool.” I once worked with this indie rock band who had this elaborate concept involving time travel and dinosaurs. It was wild, but hey, it was their vision, so we made it work!
On the flip side, I’ve had artists who just shrug and say, “You’re the expert, you figure it out.” That can be both liberating and terrifying. I remember this one time, I came up with what I thought was a brilliant concept for a pop song. Spent days on the storyboard, was super proud of it. Showed it to the artist, and they just stared at me blankly and said, “I don’t get it.” Talk about a ego deflator! But you know what? That’s part of the process. You gotta be ready to go back to the drawing board.
Collaborating with the Label
Now, let’s talk about dealing with record labels. Hoo boy, that’s a whole other kettle of fish. Labels often have their own ideas about what will sell, and sometimes that clashes with the artistic vision. I’ve been in meetings where the label exec is pushing for more close-ups of the artist’s face, while the artist wants to do this abstract, arty thing where you never see them clearly. It can get pretty heated!
The key is to find a balance. You gotta be diplomatic, but also stand your ground when it really matters. I’ve learned to pick my battles. Sometimes, you gotta let the label have their way on the small stuff so you can win on the big, important creative decisions.
One thing I always try to do is come prepared with examples and data. If I’m pitching an unconventional idea, I’ll bring references of similar videos that have been successful. It’s harder for a label to shoot down an idea when you can show them it’s worked before.
But here’s the real challenge – balancing artistic vision with commercial appeal. At the end of the day, music videos are a promotional tool. They need to connect with fans and potential fans. I’ve had to gently steer artists away from ideas that were super cool but might have been a bit too out there for their audience.
I remember this one pop artist who wanted to do this really dark, edgy video. It was a great concept, but it was so far from their usual bubblegum image that we were worried it would alienate their fans. We ended up finding a middle ground – kept some of the edgier elements but wrapped them in a more familiar, upbeat package. The artist was happy, the
Conclusion
Congratulations! You’re now equipped with the knowledge to create compelling music video storyboards that will set your productions apart.
Remember, a great storyboard is your roadmap to success, guiding your team from concept to completion. As you embark on your next music video project, let your creativity soar and your storyboard be the canvas for your artistic vision.
Who knows? Your next storyboard might just be the blueprint for the next viral sensation.
So grab your tools, put on your favorite track, and start visualizing – your audience is waiting for your masterpiece!

